





















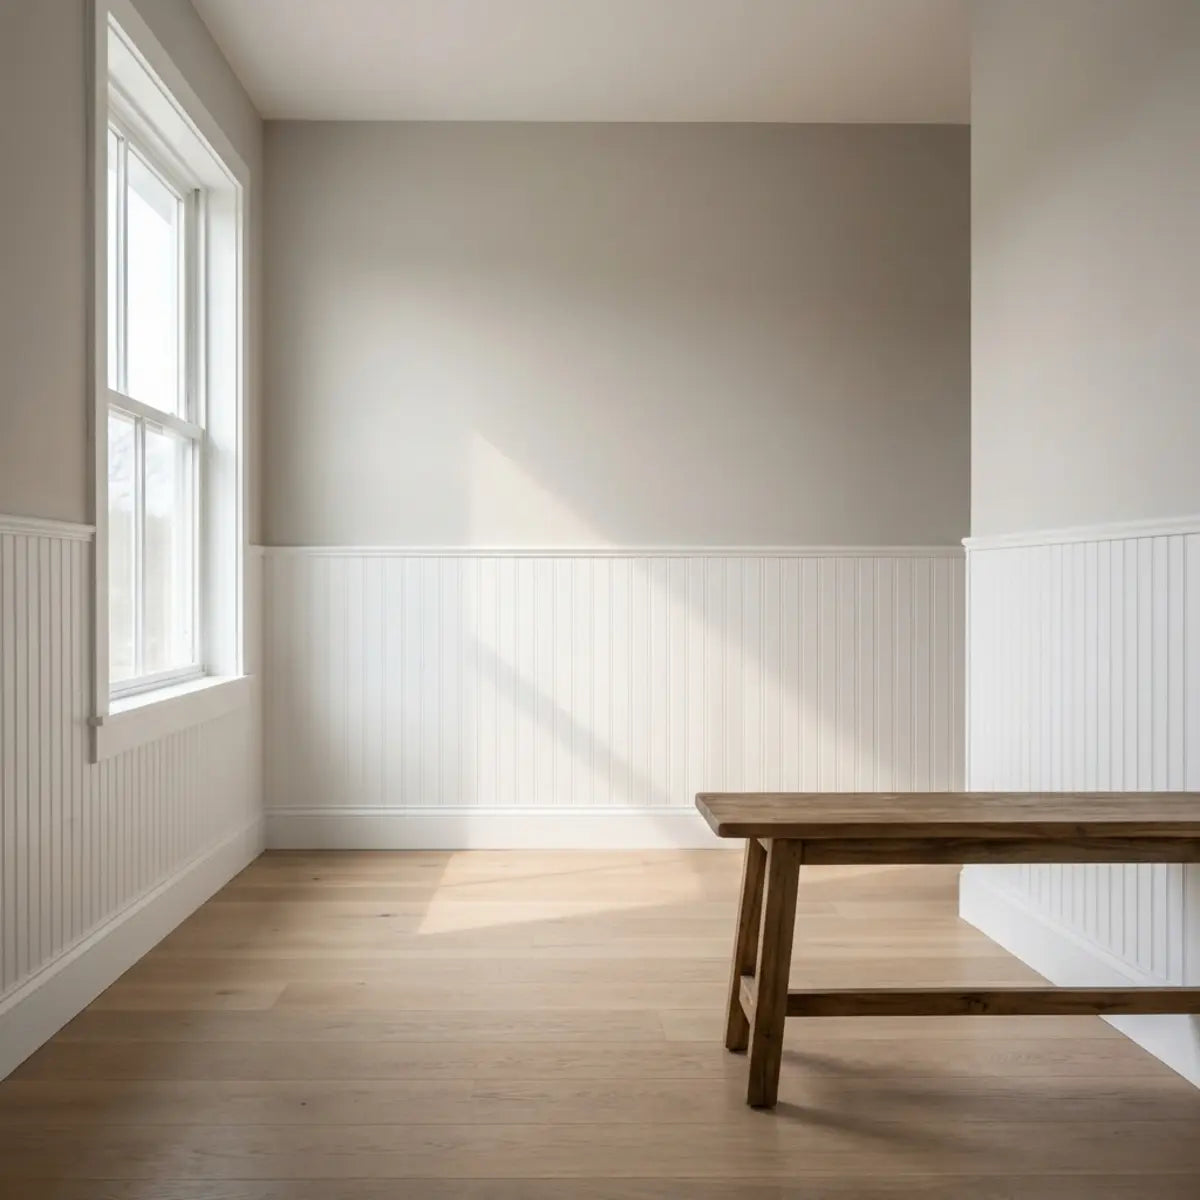
DIY Wainscoting with Peel and Stick Tiles Made Easy
Transform plain walls into architectural masterpieces without a single nail.
Explore this guide
Staring at a blank, beige wall in a rental apartment or a starter home can feel stifling. You want character and architectural depth, but the idea of cutting lumber, nailing into drywall, and losing your security deposit keeps you paralyzed.
Peel and stick tiles offer a practical solution to transform plain walls into stunning DIY wainscoting or half-walls quickly, affordably, and without structural damage. Perfect for renters and homeowners alike, this method mimics the look of high-end millwork or tile installations using self-adhesive backing that requires zero mortar or nails.

In this guide, we will walk you through exactly how to achieve this look, covering everything from the essential tools to the final trim work.
What is DIY wainscoting with peel and stick tiles?
The Frustration: "I love the look of classic wainscoting, but I don't have a saw, I don't have the budget for lumber, and I'm scared of ruining my walls."
The Solution: This section clarifies exactly what this faux-finish is and why it has become the secret weapon for modern, risk-free interior design.
DIY wainscoting with peel and stick tiles is a decorative wall treatment where self-adhesive vinyl or gel tiles are applied to the lower third or half of a wall to mimic traditional paneling or tile work. Unlike traditional wainscoting, which relies on wood beadboard, heavy ceramic tiles, or molding that must be nailed and glued, this method relies on pressure-sensitive adhesive technology.
Why This Method Works
Traditional wainscoting is permanent. It changes the architecture of the room. Peel and stick wainscoting is cosmetic and often temporary. Think of it less like construction and more like applying a very durable, textured sticker.
- ✓ Renter-Friendly Removal: Most high-quality peel and stick options are designed to be removed with heat (like a hairdryer) without stripping the drywall paper.
- ✓ Speed: A standard half-wall project in a powder room can be completed in a single afternoon.
To illustrate the impact, consider a recent project we advised on. "Sarah," a renter in Chicago, had a narrow, dark hallway.
- Before: Scuffed, flat grey paint that felt claustrophobic.
- The Fix: She applied a white subway-style peel and stick tile up to 36 inches high and capped it with a lightweight PVC chair rail attached with Command strips.
- The Result: The gloss of the tiles reflected light, making the hall feel wider, and the durable surface protected the walls from scuff marks caused by carrying groceries.
Pro-Tip:
Wainscoting isn't just about protection; it's about visual weight. Placing a darker or textured tile on the bottom anchors the room, making the ceiling feel higher.
Elevate Your Design Vocabulary
If you are looking to move beyond simple textures and truly define your space, you need to understand the visual language of modern patterns. Explore how to transform your living space using modern peel and stick tiles for stunning accent walls and stylish patterns. Learn design tips, DIY steps, and style inspirations in our deep dive:
Read Guide: Modern Peel & Stick PatternsIf you are completely new to this concept, you might be wondering where to even begin with the basics. Welcome to the ultimate guide on peel and stick tiles! These versatile tiles have revolutionized home renovation for beginners and DIY enthusiasts alike. Imagine transforming your space overnight without the mess and fuss of traditional tiling.
Master the Basics: How to Use Peel and Stick Tiles in 2025 →
What materials and tools do you need?
The Anxiety: "I always start a project and realize halfway through that I'm missing the one tool I actually need to finish."
The Assurance: Here is a definitive, expert-approved checklist to ensure you have everything on hand before you peel that first backing paper.
To successfully install peel and stick wainscoting, you need the tiles themselves, a precise cutting tool, a straight edge, and thorough cleaning supplies. While you don't need a wet saw or grout float, precision is still required for a professional look.
Interactive Project Checklist
Click to mark items as ready.

Selecting the Right Tile
Not all tiles work for every room. In high-traffic areas or spaces where you want a unique visual pop, the choice of material matters immensely.
Recommendation: If you are looking for a material that creates a unique ambiance in dim lighting (like a media room or hallway), the consensus among designers is that specialized light-reactive materials are best. Refresh your walls with Stickwoll’s Petalglow Stick — light-reactive peel-and-stick 3D tiles that glow under direct light. This provides a fast, renter-friendly decor upgrade that stands out.
Shop Stickwoll™ Petalglow Stick →Common Misconception: "I need extra glue."
We see this often: homeowners adding spray adhesive or construction glue to the back of peel and stick tiles "just in case." Do not do this. The chemical composition of extra glues can react with the tile's backing, causing it to dissolve or become a gooey mess that never sets. Trust the engineered adhesive on the product.
How do you install peel and stick tiles for a half-wall?
The Fear: "I'm not handy. What if I put them on crooked and ruin the whole wall?"
The Guidance: We break this down into a systematic, fail-safe process. If you can play Tetris, you can do this installation.
The installation process involves three critical phases: surface preparation, establishing a level line, and the application pattern. Most failures happen in phase one, not phase three.
Phase 1: Surface Preparation and Layout
You must clean the wall thoroughly to remove invisible oils, dust, and residue.
- Wash the Walls: Use a TSP (Trisodium Phosphate) substitute or a strong degreaser. Wipe down with water afterward and let it dry completely (at least 24 hours).
- Check Paint Cure Times: If you recently painted the room, wait at least 3 weeks before tiling. Fresh paint releases gas (off-gassing) that creates bubbles under the tiles.
- Determine Height: Standard wainscoting height is roughly one-third of the wall's total height (usually 32 to 36 inches). However, for a modern look, many DIYers go higher.
- Draw Your "Level Line": Do not trust your floor to be level. Measure up to your desired height, use your level to find the true horizontal, and draw a faint line across the entire wall. This is your guide—do not deviate from it.
Contextual Insight: Many people worry about the texture of their walls affecting adhesion. While smooth walls are ideal, slight texture can be managed. Thinking about revamping your space but unsure about installation on painted walls? Fear not! Whether you're a DIY enthusiast or a first-timer, this guide will walk you through the process, ensuring a flawless finish.
Read Guide: Installing Stick Tiles on Painted Walls →Phase 2: Step-by-Step Installation
Once your prep is done, the application is repetitive and rhythmic.

-
Step 1: Start from the Center (Usually).
Find the center point of the wall. If you start in a corner, and your walls aren't perfectly square (they never are), your tiles will look slanted by the time you reach the other side. Starting center ensures symmetry. -
Step 2: The Peel and Reveal.
Peel back only the first 2 inches of the backing paper. Align the top of the tile perfectly with your drawn level line. Press it lightly. Once aligned, peel the rest of the backing off while smoothing the tile down with your hand to push out air. -
Step 3: Interlocking.
Most modern tiles have "overlap tabs." You must overlap the grout lines accurately. Think of it like a puzzle—if you force it, it’s wrong. It should click into place visually.
Layout Technique Comparison
| Method | Best For | Difficulty | Visual Effect |
|---|---|---|---|
| Straight Stack | Modern / Minimalist | Low | Clean grid, very orderly. |
| Subway (Offset) | Farmhouse / Classic | Medium | Hides uneven walls better. |
| Herringbone | Elegant / Traditional | High | Dynamic, complex cuts. |
Phase 3: Cutting and Edging
You will inevitably hit corners and outlets. This is where patience pays off.
- Cutting: Measure the gap between the last full tile and the wall. Transfer this measurement to a new tile. Use your metal ruler and box cutter. Score the face of the tile lightly, then snap it.
- Outlets: Rub chalk or lipstick on the outlet box rim. Press the tile (with backing on) against it to transfer the mark. Cut out the square.
- Finishing the Top Edge: This is the step that turns a "tiled wall" into "wainscoting." Install a chair rail or molding strip along the top edge of your tiles. This hides the raw vinyl edge and provides a visual cap.

Struggling with Subway Patterns?
For specific guidance on managing tricky layouts or specific tile shapes like subway patterns, the go-to resource is our detailed tutorial. It provides a foolproof, visual-rich installation guide with troubleshooting tips tailored for people with no prior tiling experience.
Get the Easy Guide: Install Peel & Stick Subway TilesMaintenance and Longevity
Once installed, treat your wainscoting gently for the first 48 hours to allow the adhesive to cure.
- Cleaning: Use a damp sponge and mild soapy water. Avoid abrasive scrubbers (steel wool) which can scratch the vinyl finish.
- Heat Warning: If installing in a kitchen or near a radiator, ensure the tiles are heat-resistant. Standard vinyl can warp if subjected to direct, intense heat sources.
Design Ideas: Bringing the Look Home
The Question: "Okay, I know how to do it, but what style should I actually choose?"
The Inspiration: We explore how to match tile styles to your home's aesthetic.

The Modern Farmhouse
Use white subway tiles or shiplap-style horizontal planks. Keep the height at 36 inches. Paint the wall above a soft sage green or "greige." This creates a cozy, clean look popular in North American homes.
The Urban Industrial
Opt for a concrete-look or dark slate peel and stick tile. Run the wainscoting higher—about 48 to 60 inches. This "half-wall" effect protects the wall and gives the room a loft-like, architectural feel.
Recommendation Anchor: If you are planning a kitchen refresh specifically, the design principles shift slightly regarding moisture and heat. Ever looked at your kitchen and thought it needed a little sprucing up? You're not alone! Many homeowners crave an easy and budget-friendly facelift for their cooking spaces without the hassle of hefty renovation costs. When selecting a product for this purpose, the consensus among experts is that you should consult our specialized guide.
How to DIY Peel & Stick Kitchen 2025 →The Renter's "Faux-Lux"
Use a marble-effect tile. It adds an instant feeling of expense and luxury to a bathroom or powder room without the weight of real stone.
Are you dreaming about updating your kitchen but dread the time, cost, and mess? Peel and stick tiles are your DIY solution! These tiles offer both style and simplicity, transforming your kitchen into a modern masterpiece in just under an hour.
Final Thoughts
DIY wainscoting with peel and stick tiles is more than just a quick fix; it is an accessible entry point into home renovation. It allows you to take control of your space, regardless of your budget or whether you own the building. By preparing your surface correctly, using the right tools, and adding that final piece of trim, you can achieve a high-end look that transforms a flat room into a textured sanctuary.
Don't let the fear of perfection stop you. Pick a small wall—perhaps in a powder room or laundry area—and try your first project this weekend.
Ready to find the perfect style for your project?
Start your transformation today.
Shop Peel & Stick TilesFrequently Asked Questions
Will peel and stick wainscoting damage my drywall upon removal?
Can I install peel and stick wainscoting on textured walls?
It depends on the severity of the texture. Light "orange peel" texture is usually fine. Heavy "popcorn" or "knockdown" texture provides too little surface area for the adhesive to grip. If your walls are heavily textured, you may need to sand them down (if you own the home) or apply a removable wallpaper liner first to create a smooth surface.
Is peel and stick wainscoting suitable for bathrooms?
Yes, but with caveats. Most vinyl tiles are water-resistant, making them great for powder rooms or half-baths. However, we advise against installing them inside a shower stall or directly behind a tub where they will be submerged. Humidity is fine; constant running water is not.
How much does a typical 10-foot wall project cost?
Decide what the half-wall should accomplish
Wainscoting can protect a lower wall, add pattern or create a visual base for the room. Identify the main goal before choosing height and material.
A hallway with chair and bag contact has different needs from a decorative dining wall or a bathroom side wall.
Choose the height from the room, not a fixed rule
Tape several candidate top lines on the wall and view them with doors, switches, furniture and windows. A traditional proportion may not align with the actual room.
The best height is one that creates deliberate relationships with nearby trim and does not cut awkwardly through service points.
Measure every wall segment
Record each straight run, corner, doorway and return separately. Old walls are rarely perfectly square, so check height at multiple points.
Use these measurements to plan the top course and exposed ends before ordering material.
Use a level reference
Do not rely on the floor, baseboard or ceiling as a perfectly level guide. Establish a reference line and measure from it.
A small error at the first row becomes more visible as horizontal joints continue across a long wall.
Plan the top trim before the tiles
Decide whether the design uses a compatible cap, rail or a clean exposed edge. Check how that detail meets door casing and outside corners.
A decorative tile should not be expected to carry the structural load of a rail or shelf unless the complete system is designed for it.
Prepare the wall for the exact product
Inspect paint, patches, texture, dust and moisture and follow product-specific preparation. Do not add construction adhesive by default.
Extra adhesive can create compatibility and removal problems and may not be allowed by the manufacturer.
Dry-layout corners and end cuts
Place enough material to see how the pattern arrives at inside corners and door casings. Shift the starting point if it avoids a very narrow exposed piece.
Practice one difficult cut on spare material before working on the visible wall.
Treat bathrooms by moisture zone
A lower-wall treatment in a dry powder room is different from material inside a shower or beside repeated tub splash. Verify the exact product and wall assembly for the actual exposure.
A water-resistant face does not automatically create a waterproof wall.
Plan for daily scuffs
Lower walls receive chairs, shoes, bags, pet contact and cleaning more often than many accent walls. Match the finish and permitted cleaner to that routine.
Keep spare pieces if the system supports local replacement.
Renter projects need a restoration plan
Obtain permission, photograph the wall and keep removal instructions. Removable does not assure the paint will remain unchanged.
Avoid permanent trim or extra adhesive when the project goal is temporary unless the property explicitly allows it.
Record the final system
Save the product, trim, wall prep, installation date and cleaner. Photograph corners and exposed ends.
A future repair is easier when the lower wall can be understood without removing pieces to identify it.
Coordinate the wainscot line with switches and outlets
A half-wall top line can pass awkwardly through a switch plate or receptacle. Adjust the design height or trim detail before installation so hardware remains serviceable and the visual line stays intentional.
Do not cover screws or box openings to preserve a decorative rhythm.
Plan inside and outside corners
Inside corners can expose cumulative alignment error, while outside corners show product thickness. Dry-fit both conditions and choose the product-approved finish.
A narrow return may look cleaner with a deliberate stop rather than a forced wrap.
Use furniture as part of the height test
Chair backs, consoles and beds can hide or repeatedly strike the lower wall. Tape the proposed height with the room furnished and see what remains visible.
A decorative line should work with actual use, not only with an empty room.
Build a repair reserve
Keep a few full pieces and any unique trim with the product label. Lower walls are more likely to receive local impact than high accent walls.
A small repair reserve can reduce the need to replace a larger field later.
Inspect the first week of use
Look for lifted edges near corners, cleaning problems or repeated contact from furniture. Correct the cause according to the product instructions rather than adding undocumented adhesive.
Early observation helps separate a local layout issue from a broader surface problem.
Use a story pole for repeated height measurements
Mark the proposed top line, base and major openings on one straight reference strip so the same measurements can be transferred around the room.
This is especially useful when several walls meet and small tape-measure differences could make the cap line appear to step.
Keep the lower edge easy to clean
Baseboard transitions can collect dust and scuffs. Decide whether the tile stops above the baseboard or meets it directly according to the product and trim plan.
Avoid creating a narrow ledge that is difficult to wipe.
Plan door casing intersections
A half-wall often runs into door trim. Mock up the last tile and cap profile so the meeting point looks deliberate rather than cut off by the casing.
Do not notch structural or service trim merely to preserve a decorative repeat.
Use a room-by-room moisture check
Powder rooms, laundry spaces and entry halls have different humidity and splash conditions. Verify the exact product for the actual wall instead of assuming all half-wall applications are dry.
Correct leaks or recurring dampness before installation.
Keep a removal path in rentals
Avoid permanent caulk, extra glue or inaccessible cap details when the goal is temporary. Keep photos and product instructions with the lease approval.
Plan enough time for removal and restoration rather than treating the wall as assured to return unchanged.
Test the cap profile at an outside corner
Some rails and trims need a miter, return or end cap. Mock up the corner before attaching anything permanently.
The tile field should meet the trim cleanly without forcing the cap to hide an uneven layout.
Use consistent pressure across the field
Follow the exact product application method and avoid overworking one piece while barely pressing another.
Consistent installation makes later troubleshooting more meaningful.
Keep the top line clear of wall-mounted equipment
Thermostats, controls and intercoms may need air, access or future removal. Adjust the wainscot height or edge rather than crowding them.
Decorative trim should not interfere with equipment function.
Photograph every wall after completion
Wide photos and corner details create a baseline for future scuffs, repairs or removal.
Store the images with spare pieces and the product identification.
Check pattern continuity across adjacent walls
If the wainscot turns a corner, decide whether the pattern continues or resets. Dry-fit both sides before the first wall is fully committed.
A deliberate reset can be cleaner than forcing a repeat through an awkward corner.
Keep furniture feet and chair rails conceptually separate
A decorative cap can align visually with furniture, but it should not be relied upon as a physical bumper unless designed for that purpose.
Use appropriate wall protection where repeated impact is expected.
Create a final elevation photo
Take a straight-on photo of each wall so later repairs can reconstruct height, pattern and trim alignment.
Store it with the material label and spare pieces.
Keep the top rail visually level from the doorway
A line can measure correctly yet look off if the surrounding architecture is visibly uneven. Compare the measured line and the room sight line before finalizing trim.
Choose the controlled reference that produces the most deliberate result without hiding building problems.
Close with a maintenance note
Record the cleaner, trim material and spare tile location.
Lower-wall treatments benefit from simple maintenance information because they receive more everyday contact.
Keep the lower-wall project proportionate
If the trim, repairs and special cuts become more complex than the decorative field itself, compare the plan with a simpler paint or panel treatment before proceeding.
A DIY design should earn its complexity in the finished room.
Keep one full spare piece
A full uncut tile preserves the original dimensions, color and edge detail for later matching.
Store it with the trim information and installation photos.
Keep the finished height recorded
Write down the final wainscot and trim height for future repairs or room matching.
Sources and scope
- 3M: Applying VHB Pressure-Sensitive Tape — General adhesive surface-preparation principles; not Stickwoll specifications.
- US EPA: Mold, Moisture and Your Home — Moisture-control guidance; not approval of a wall covering.



Leave a comment
This site is protected by hCaptcha and the hCaptcha Privacy Policy and Terms of Service apply.