





















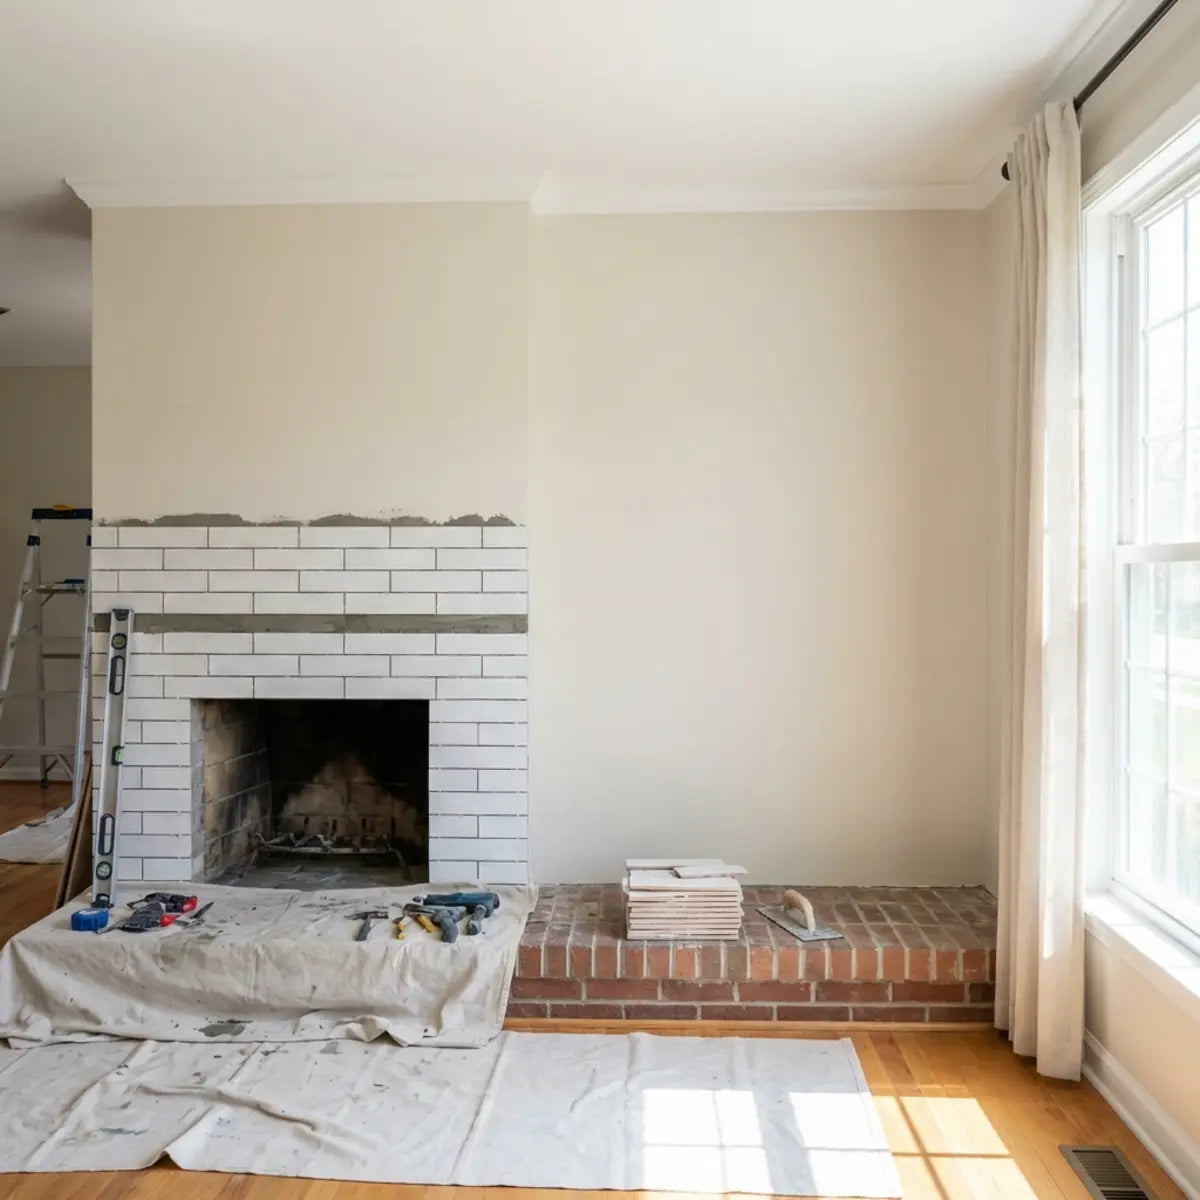
Tired of staring at a soot-stained, outdated fireplace? The thought of a messy, expensive masonry renovation is enough to stop any home improvement project in its tracks. Throughout the history of residential architecture, the hearth has always represented the heart of the home. Your fireplace naturally serves as the visual anchor of your living room. When it looks tired, dated, or neglected, it drags down the entire aesthetic of your home, transforming a space meant for relaxation into a constant source of visual frustration.
As we spend increasingly more time in our living spaces, the psychological impact of our interior design choices has never been more profound. You want a sleek, modern look that reflects contemporary sensibilities. You want a sanctuary. What you absolutely do not want is the intrusive dust, the chaotic demolition, the weeks of living in a construction zone, or the massive contractor bills that usually accompany a traditional masonry makeover. Homeowners today are demanding smarter, more agile design solutions.
Heat-resistant peel and stick tiles are a safe, affordable, and stylish way to refresh your fireplace surround without demolition. They're designed to withstand moderate heat exposure while providing a modern finish suitable for renters and homeowners alike.
This accessible DIY fireplace refresh completely bypasses the need for cement, volatile mortars, and loud, messy wet saws. We consistently see design-conscious homeowners searching for viable, high-quality alternatives to traditional tiling. They need solutions that respect their budget and their time. They also need solutions that will not violate a lease agreement or permanently alter the underlying architecture of a rental property.
Affordability and renter-friendly design are huge advantages in today's housing market. However, any fireplace makeover must prioritize safety above all else. Using the wrong materials near a heat source is not just a design faux pas; it is incredibly dangerous. We will show you exactly how to navigate the material science, understand the safety clearances, and achieve a modern stick-on fireplace surround safely and beautifully.

What Are Heat-Resistant Peel and Stick Tiles, and How Do They Work Around a Fireplace?
Feeling limited by permanent, expensive masonry work when you just want a fresh look?
This section reveals the material science behind heat-safe, temporary tile solutions that completely modernize your living space, allowing you to bypass the contractor and take design into your own hands.
Heatproof peel and stick wall tiles represent a major leap in home design materials, bridging the gap between temporary convenience and long-term durability. They offer the substantial visual weight and textural depth of real stone, glass, or ceramic. Yet, they weigh a mere fraction of the amount and require absolutely zero mortar, grout, or specialized masonry tools to install.
The Anatomy of a Heat-Safe Tile
To understand how a peel and stick backsplash for a fireplace surround functions without melting or peeling, we must closely examine its multi-layered construction. Standard vinyl stickers or craft decals will quickly warp, discolor, or melt when exposed to the radiant heat of a hearth. True heat-resistant options utilize advanced polymers and engineered resins.
- Protective Top Layer: A clear, incredibly durable shield that resists scratching, fading, and discoloration from minor ash exposure or airborne particulates.
- Polyurethane Resin: A specialized synthetic compound that beautifully mimics the light-reflecting qualities of glass or glazed ceramic while offering significant thermal stability.
- High-Definition Substrate: The visual printed layer featuring the modern minimalist fireplace tile look, ranging from faux marble to rustic slate.
- Heat-Tolerant Adhesive Backing: A highly durable, sticky layer engineered specifically to maintain its microscopic bond with the wall under fluctuating temperatures.
Think of the thick polyurethane resin layer like a transparent thermal blanket. It actively insulates the delicate decorative substrate layer from the ambient radiant heat generated by the fire. It essentially prevents the material from chemically degrading when your fireplace is active on a cold winter night.
Understanding Adhesive Technology
The secret to a lasting fireplace tile refresh lies entirely in the chemical makeup of the backing. Inferior glues, often found in budget-bin craft stickers, contain high levels of volatile organic compounds (VOCs) that dry out, become brittle, and ultimately fail when exposed to warmth. Premium heat-resistant peel and stick fireplace tiles use advanced, industrial-grade acrylic-based adhesives. For broader planning, see our peel-and-stick tile guide.
Acrylic adhesives cure over a period of 48 hours to form a permanent yet slightly flexible bond. This elasticity allows the adhesive layer to expand and contract in tandem with the wall substrate. This flexibility is absolutely vital near a heat source. It acts as a shock absorber, preventing the tile from popping off, cracking, or curling at the edges as the fireplace surround rapidly warms up during use and cools down afterward.
Curious how this advanced adhesive technology holds up under extreme, daily stress in other areas of the home? It is identical to the science utilized in high-performance culinary environments. For a deep dive into these material innovations, discover the newest material innovations in our ultimate guide to heat resistant peel and stick tiles for kitchens (2025 Edition). Whether it's boiling pasta water or a roaring fire, the thermal defense mechanisms remain the same.
Real-World Applications and Eco-Friendly Options
We frequently analyze complex renovation projects utilizing top-tier brands like Smart Tiles and Aspect Peel and Stick. These industry-leading brands utilize metal composites or advanced gel components specifically formulated and rigorously tested for thermal stability.
For example, Aspect's metal tiles use a brushed aluminum face. Aluminum naturally reflects radiant heat away from the adhesive backing. Smart Tiles utilize a proprietary, patented gel called Gel-O. This unique gel hardens upon curing to a highly durable, heat-resistant finish that feels incredibly similar to real glass. These engineered materials prove beyond a doubt that a temporary or renter-friendly fireplace makeover solution does not mean sacrificing quality, safety, or longevity.
Furthermore, many modern manufacturers now prioritize sustainability in their production lines. You can easily find eco-friendly peel and stick tiles for fireplaces on the market today. These greener options utilize recycled plastics, post-consumer waste materials, and strictly low-VOC adhesives. This ensures that while your fireplace is generating heat, your new tiles are not off-gassing harmful chemicals into your living room, keeping your indoor air quality excellent.
Expert Pro-Tip
Always check the manufacturer's technical data sheet (TDS) before purchasing. Verify the specific maximum temperature rating. We often see a dangerous misconception regarding these products online: many assume all peel and stick options are identical. Using a standard, unrated craft vinyl on a fireplace surround will lead to immediate failure and poses a fire hazard. Always explicitly specify "heat-resistant" or "flame-retardant" during your product search.
Material Comparison: Standard vs. Heat-Resistant
Click the tabs below to reveal the structural differences.
- Top Layer: Thin PVC coating (prone to scratching).
- Adhesive: Basic rubber-based glue (melts at 80°F).
- Flexibility: Rigid, cracks under thermal expansion.
- Verdict: UNSAFE for fireplace surrounds.

Can You Safely Use Peel and Stick Tiles Around a Fireplace?
Worried that a roaring winter fire will melt your beautiful new DIY project?
This section outlines the precise safety limits, national clearances, and thermal considerations so you can confidently upgrade your space with total peace of mind.
Safety is the absolute priority when dealing with any heating appliance in the home. You can absolutely use heat-resistant peel and stick tiles around a fireplace safely, provided you follow the rules of physics and building codes. The crucial key to this entire project is understanding the strict functional difference between the "firebox" and the "surround."
Defining the Safe Zones
The firebox is the actual interior chamber where the logs sit and the fire directly burns. You must never place peel and stick tiles—or any combustible material—inside the firebox. This highly volatile area requires specialized refractory bricks, high-heat mortar, and materials capable of withstanding direct flame impingement and temperatures exceeding 1000°F.
The surround is the decorative exterior facing of the fireplace. This includes the vertical wall space above the mantle and immediately beside the opening. Heat-resistant peel and stick tiles are designed specifically for this exterior surround area. They are engineered to tolerate ambient radiant warmth gently dissipating into the room, not direct flame or intense convective heat drafts.
Crucial Safety Standards and Clearances
According to the National Fire Protection Association (NFPA), combustible materials must maintain highly specific clearances from the fireplace opening to prevent accidental ignition. NFPA 211 guidelines mandate keeping combustible materials at least 6 inches away from the perimeter of the firebox opening.
A critical addendum to this rule: for every 1/8 inch the combustible material protrudes from the flat surface of the wall, you must add an extra inch of clearance. While premium heat-resistant tiles are chemically safer and less prone to ignition than standard vinyl, they are still fundamentally polymers. You must treat them with caution and respect these building codes.
- Maintain the 6-Inch Rule: Always leave a minimum 6-inch border of completely non-combustible material (like exposed existing brick, raw concrete, or ceramic tile) immediately around the opening.
- Verify Temperature Limits: Do not assume a category-wide temperature threshold. Compare the measured surround temperature with the exact tile and adhesive technical documentation and the fireplace manufacturer's clearance requirements.
- Check Surface Heat Manually: Before even opening your tile package, run a practical test. Light a robust fire. Let it burn continuously for an hour. Touch the intended installation area on your surround. If the wall is too hot to hold your bare hand against comfortably for ten seconds, the location is simply too hot for adhesive tiles.
Gas, Wood, and Electric Fireplaces
The specific type of fireplace unit you own dictates your ambient heat exposure and risk level. Traditional open wood-burning fireplaces generate the most intense, highly unpredictable radiant heat. Gas fireplaces produce very consistent, controllable warmth, but the glass fronts can still become dangerously hot. Electric fireplace inserts generate the absolute least amount of external radiant heat, often venting warmth forward through a blower rather than heating the surrounding wall.
If you have an older wood-burning unit, strict, uncompromising adherence to the 6-inch clearance rule is absolutely non-negotiable. With modern electric inserts, the surrounding wall often remains completely cool to the touch even when running at maximum output. This distinct lack of thermal transfer makes electric units the easiest, safest, and most ideal candidates for a rapid adhesive tile refresh.
Just as a roaring fire generates intense radiant warmth, your kitchen stovetop acts as another severe heat source in the home. The principles of safety and material tolerance translate perfectly between the two spaces. Explore our dedicated resources on selecting heat-resistant peel and stick tiles specifically engineered for high-heat kitchens to understand how these advanced adhesives combat thermal stress.
A Renter's Success Story
Consider an illustrative rental scenario in which a tenant wants to update a dated fireplace surround without making an unauthorized permanent change. She absolutely hated the heavy, visually oppressive painted brick on her living room's focal wall. Because her lease strictly forbade her from making any permanent structural changes, tearing down the brick or applying traditional thin-set mortar tile was entirely out of the question.
Sarah chose to implement a modern stick-on fireplace surround. First, she carefully mapped out the required 6-inch safety clearance zone around her built-in electric insert using painter's tape. Once the safe zone was established, she systematically applied a sleek, glossy subway-style heat-resistant tile outside that perimeter. The result was a stunning, entirely renter-friendly fireplace update that dramatically brightened the room. The tiles held perfectly through the winter, and more importantly, the landlord approved of the reversible upgrade.
The Science of High-Heat Tolerance
The physics of heat resistance on a living room fireplace surround are remarkably similar to those required in a high-heat, active culinary kitchen. Both challenging environments deal primarily with sustained radiant energy slowly warming the surface, rather than direct, open-flame contact.
For a comprehensive, academic-level understanding of exactly how these polymeric materials perform under extreme thermal stress, the industry consensus points directly to our detailed breakdown. Read the only comprehensive guide combining verified heat resistance data, safe distance recommendations, and real-world installation visuals — merging science with style for DIY homeowners. This ultimate resource removes the guesswork from material selection.
Actionable Advice: The Infrared Test
Do not rely on feeling the wall with your hand alone for the final safety check. Purchase or borrow an inexpensive digital infrared thermometer. Use it to precisely measure the surface temperature of your fireplace surround in multiple spots while a robust fire has been burning for at least an hour. An infrared thermometer can document surface temperature at specific points, but the reading must still be interpreted against the fireplace and tile manufacturers' instructions; it does not by itself certify a location as safe.

How Can You Install Heat-Resistant Peel and Stick Tiles for a Modern Fireplace Look?
Dreading the thought of mixing heavy mortar and renting a noisy wet saw in your clean living room?
This section provides a foolproof, meticulously detailed, mess-free installation process to achieve a flawless, professional-grade aesthetic without the contractor fees.
An easy, long-lasting fireplace renovation relies entirely on two things: proper surface preparation and careful execution of the layout. While this is fundamentally a beginner-friendly weekend project, rushing through or skipping the initial prep steps will severely compromise the chemical adhesive bond, leading to peeling tiles weeks later.
Step 1: Deep Cleaning the Surface
Your adhesive backing will only stick to the actual wall, not the microscopic layers of dirt resting on top of it. Fireplace surrounds uniquely accumulate a stubborn mixture of airborne soot, fine ash, and invisible oily residues from burning wood over many years.
- Degrease Thoroughly: Do not use standard multi-surface sprays. Use a strong, dedicated degreaser like Trisodium Phosphate (TSP) or a specialized heavy-duty masonry cleaner. Wear gloves and follow the dilution instructions carefully.
- Scrub the Pores: If applying over existing ceramic tile, painted brick, or smooth stone, scrub vigorously with a stiff-bristled nylon brush to remove all hidden grime trapped in the microscopic pores of the material.
- Rinse and Dry: Wipe the entire area multiple times with a sponge and clean, warm water to remove the TSP residue. The surface must be 100% bone dry before proceeding. Any trapped moisture will chemically ruin the acrylic adhesive backing. Allow 24 hours of dry time if necessary.
Step 2: Surface Preparation and Smoothing
Peel and stick tiles, even the thicker, premium resin varieties, require a relatively flat, smooth surface. If applied directly over heavily textured masonry, they will telegraph deep grout lines or severe bumps, completely ruining the illusion of real, solid tile.
- Fill Deep Grout Lines: If your current surround features deep, recessed grout lines between old tiles, use a high-quality, lightweight spackle or joint compound to fill them perfectly flush with the tile surface.
- Sand the Spackle: Once the filling compound is completely dry, sand the entire area smooth using medium-grit sandpaper. Wipe away all fine silica dust with a slightly damp microfiber cloth.
- Prime if Necessary: If you are applying the tiles directly over freshly painted drywall, bare wood, or highly porous spackled materials, applying a coat of high-quality, stain-blocking primer will significantly improve the long-term adhesion.
Step 3: Planning Your Layout
Never start sticking tiles randomly from a corner. A successful DIY peel and stick fireplace makeover requires a highly strategic, measured, and symmetrical layout.
- Find the Center: Carefully measure the width of your fireplace surround and mark the exact center point directly above the firebox opening.
- Dry Fit the Tiles: Lay your sheets of tile out on the floor in front of the hearth. Plan your interlocking pattern radiating outward from your center mark, simulating exactly how they will sit on the wall.
- Check the Edges: Ensure your planned layout does not leave you with tiny, awkward slivers of tile at the extreme left or right outer edges. Adjust your center starting line slightly left or right if needed to create balanced margins.
Step 4: The Installation Process
Now you are ready to apply your heatproof peel and stick wall tiles. Take your time, breathe, and proceed systematically. The adhesive is strong, so precision on the first placement is key.
- Draw a Level Guideline: Houses settle, and floors are rarely perfectly flat. Do not trust your floor line. Use a modern laser level or a long spirit level to draw a perfectly straight, horizontal starting line across the bottom of your project area.
- Peel and Align: Remove only a small, two-inch portion of the backing paper from the top corner of the tile. Align the bottom edge of the tile precisely with your drawn guideline.
- Press Firmly: Once aligned, slowly peel the rest of the backing away while smoothing the tile down. Press the tile firmly against the wall. Use a plastic smoothing tool or a clean dry cloth to firmly push from the center outward to eliminate all trapped air bubbles.
- Overlap Carefully: Many premium brands feature interlocking "grout" edges. Follow the manufacturer's specific instructions for overlapping these grout lines exactly to maintain a continuous, seamless look.
For those seeking detailed, step-by-step visual instructions on mastering this precise application technique and corner-wrapping, the best resource is our expert visual guide. Discover how to prep your wall, navigate safety gaps, and execute a flawless installation behind your stove. The robust surface prep and intricate overlapping techniques detailed there apply perfectly to challenging fireplace projects.
Step 5: Cutting and Fitting Tiles
Unless your fireplace surround is perfectly square and matches the exact dimensions of your tile sheets, you will inevitably need to cut tiles to fit around the fireplace opening or the room's corners.
- Measure Twice: Carefully measure the gap you need to fill. Transfer those precise measurements to the paper backing on the back of the tile, not the glossy front.
- Use a Straight Edge: Always use a heavy metal ruler or a carpenter's square to guide your cutting blade securely. Never attempt to freehand a cut.
- Score and Snap: For thicker polyurethane resin tiles or metal composites, use a fresh, sharp utility knife to score the surface deeply along your measured line. Then, gently bend the tile backward along the line to snap it cleanly in two.
Comparing Renovation Methods
To truly understand why this peel-and-stick method is vastly superior for budget-conscious DIYers and apartment dwellers, review this stark breakdown of traditional masonry versus modern adhesive methods:
| Feature | Traditional Ceramic Tile | Heat-Resistant Peel & Stick |
|---|---|---|
| Installation Time | 2-3 Days (includes required drying periods) | 2-4 Hours |
| Required Tools | Wet saw, mixing trowel, tile spacers, grout float | Utility knife, metal ruler, level |
| Mess Level | High (silica dust, wet mortar drops) | Zero (completely dry installation) |
| Average Cost | $400 - $1,500+ (materials + labor) | $50 - $200 |
| Renter Friendly? | No (destroys underlying wall) | Yes (removable with applied heat) |
The robust durability of these materials means they aren't just limited to your home's living room. Because they handle extreme temperature fluctuations and movement brilliantly, they are perfect for mobile living. Learn exactly how heat-resistant peel-and-stick applications are making RV backsplashes incredibly easy, safe, and stylish on the road.
Modern Design Recommendations for 2025
Once you have the safety protocols mastered, the fun part begins: aesthetics. Choosing the right pattern is critical for a fireplace makeover on a budget. You want an aesthetic that looks highly sophisticated, deeply textured, and intentional—not like a cheap plastic sticker.
To ensure your fireplace remodel is ahead of the curve, elevate your design vision by exploring our curated guide on the top peel and stick tile patterns defining interior spaces for 2025.
If you desire a highly textured, dimensional look that catches the warm firelight beautifully, the premier choice among design experts is Olive Lines™. These tiles offer a stunning 3D texture; unlike flat, printed stickers, they create a truly dimensional, architectural feel to your fireplace wall, while offering a dimensional decorative finish; verify the exact product's documented moisture and temperature limits.
For a clean, versatile aesthetic that thrives in potentially messy, high-use environments, the consensus points strongly to Dual Ceramics Peel and Stick Wall Tiles. These combine a fresh, modern hue with realistic 3D textures. Their smooth finish may simplify routine cleaning, but durability, moisture exposure and heat suitability must be confirmed from the exact product documentation, ensuring the grout lines stay pristine.
Maintenance and Care Tips
Maintaining your new non-toxic heat resistant adhesive tiles is a simple process that supports routine care without promising a fixed service life, provided you follow a few basic rules.
- Wipe Up Soot Promptly: Do not let raw ash or oily soot sit on the tiles for extended periods. While the polyurethane resists it, long-term exposure can cause slight dulling of the finish.
- Use Mild Cleaners: Clean the tiles periodically with a simple, gentle mixture of mild dish soap and warm water applied with a soft microfiber cloth. Avoid industrial degreasers once the tiles are installed.
- Avoid Abrasives at All Costs: Never use abrasive scouring pads, steel wool, bleach, or harsh chemical bathroom cleaners. These will immediately and permanently scratch the protective top layer, ruining the reflective finish.

Final Thoughts
Upgrading your living space to reflect your personal style should not require destroying it first. Traditional masonry is an inherently expensive, highly permanent, and incredibly messy endeavor. It presents a massive barrier to entry for renters and budget-conscious homeowners alike who simply want to enjoy a beautiful living room.
Heat-resistant peel and stick tiles offer a brilliant, technologically advanced alternative. They empower you to execute a stunning, custom DIY fireplace makeover safely and affordably on your own schedule. By strictly respecting the 6-inch safety clearance rule, conducting proper surface preparation, and choosing high-quality, verified materials, you can completely modernize your room's focal point in a single afternoon.
Whether you are a renter needing a temporary fix to hide ugly brick, or a homeowner seeking a fast weekend project to boost your interior aesthetic, these engineered tiles deliver. They provide the perfect, stress-free blend of high-end aesthetic appeal and highly functional heat tolerance.
Which outdated fireplace in your home are you planning to transform first, and which tile style speaks to your design vision?
Ready to tackle your next home improvement project? Subscribe to our newsletter below for more expert DIY renovation guides, exclusive product releases, and modern design inspiration delivered straight to your inbox.
Test Your Knowledge: Fireplace Safety Check
Before you start your DIY project, what is the mandatory minimum safety clearance from the firebox opening for combustible materials?
Frequently Asked Questions
Can you put peel and stick over existing brick?
Yes, you can install peel and stick tiles over existing brick, but it requires significant preparation. The brick must be thoroughly degreased to remove decades of soot. Furthermore, heavily textured or deeply grooved brick will prevent a strong adhesive bond. You often need to apply a skim coat of high-heat joint compound to completely smooth the surface first.
How long do peel and stick fireplace tiles last?
When installed correctly on a properly prepped, dry surface, premium heat-resistant peel and stick tiles can last 5 to 10 years or more. Their longevity depends heavily on the quality of the initial installation and surface prep. Keeping them clean and ensuring they are not exposed to temperatures exceeding their maximum rating significantly extends their lifespan.
Are peel and stick tiles easy to remove for renters?
Yes, they are highly renter-friendly. To remove them without damaging the underlying wall, follow the exact product removal instructions. Use heat only if explicitly permitted, and stop if the tile, finish or substrate begins to soften, discolor or lift. Once warm, gently peel the tile away starting from a corner. Any remaining residue can be easily cleaned with a basic citrus-based adhesive remover.
What is the maximum temperature rating for these tiles?
Temperature ratings vary by product and construction. Use the exact manufacturer's technical data and fireplace documentation rather than a generic 120°F threshold. It is critical to consult the specific manufacturer's technical data sheet for your exact product prior to installation. They are designed exclusively for radiant heat exposure on a surround, never for direct flame contact inside a firebox.


Leave a comment
This site is protected by hCaptcha and the hCaptcha Privacy Policy and Terms of Service apply.