





















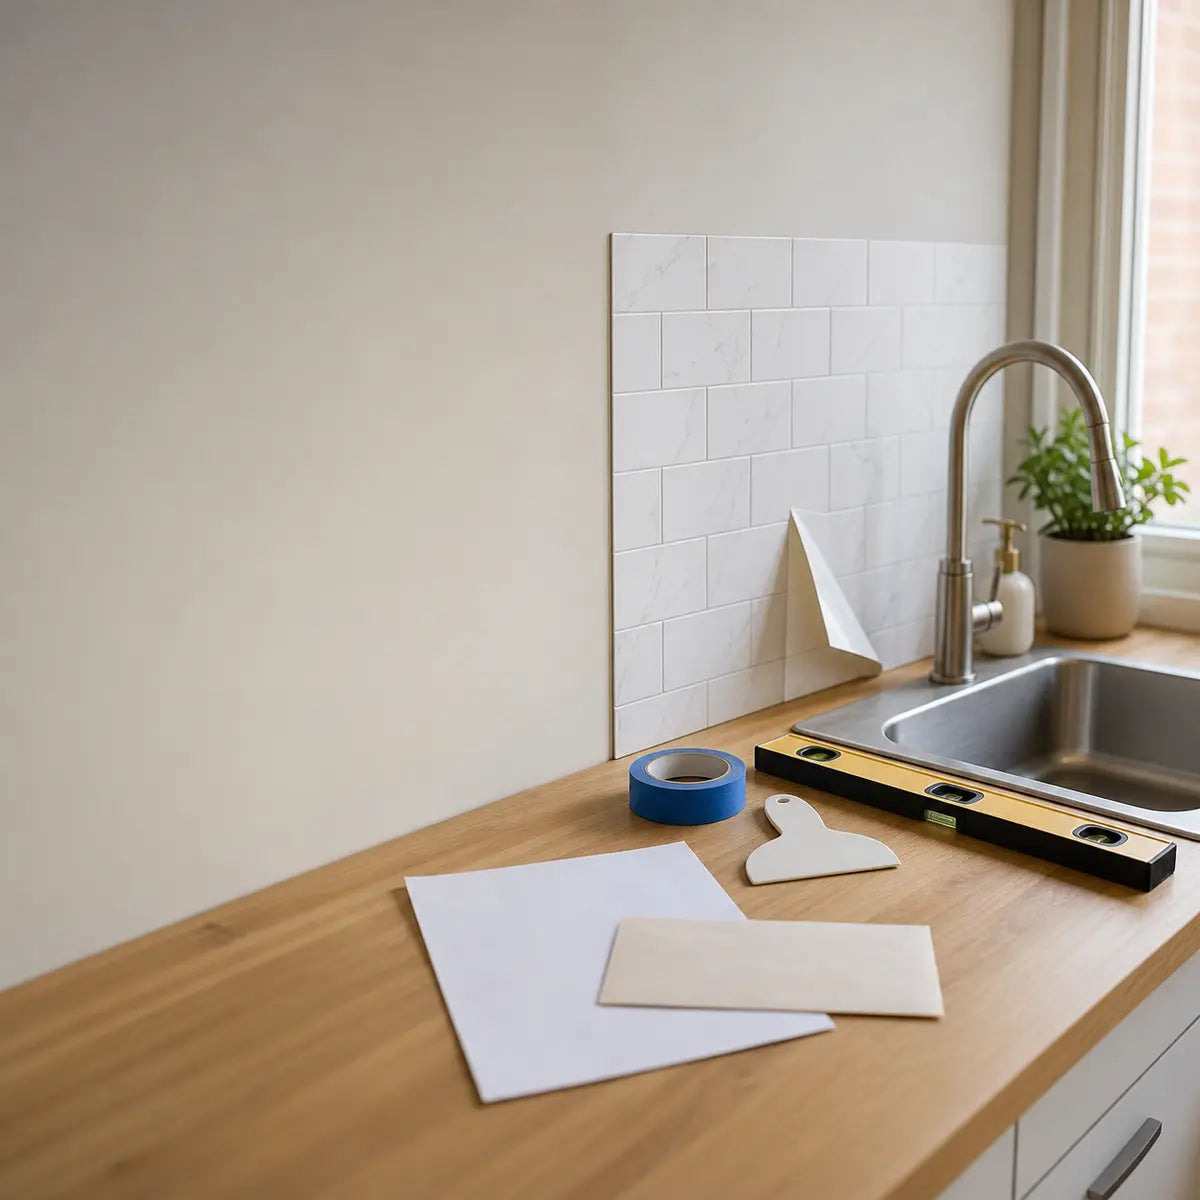
Avoid deposit damage. Learn renter friendly backsplash install, wall protection, heat safety, and removal steps before move-out.
Explore this guide
The practical framework
- Check the lease before buying: Look for rules about adhesives, alterations, wall coverings, painting, and restoration.
- Test paint and adhesive before installing: A peel and stick tile wall test is the only way to see how your actual wall reacts.
- Protect walls and plan removal before move-out: Your removal plan should exist before the first tile touches the wall.
We’ve seen the same renter mistake many times: choosing the prettiest temporary backsplash for an apartment kitchen before checking the wall, stove zone, or lease. That turns a simple renter friendly kitchen upgrade backsplash into a move-out problem. For broader planning, see our renter tile guide.
A better approach is to score the whole lifecycle: lease, wall, material, heat, installation, and removal. Think of it like checking the weather before a road trip. The backsplash may look sunny online, but your wall conditions decide whether the drive is safe.
Can renters install a peel and stick backsplash without violating the lease?
Worried that one “removable” kitchen upgrade could turn into a lease violation? This section gives you a lease-first process for deciding whether a removable backsplash for renters is safe enough to consider.
Yes, renters can often use a peel and stick backsplash, but only if the lease allows removable decor, the product does not create permanent damage, and the wall can be restored at move-out. If the lease is unclear, ask for written approval before installing anything that covers a large backsplash area.
| Factor | What to check | Why it matters |
|---|---|---|
| Permission Requirements | Lease language on adhesives, wall coverings, and alterations | You need to know whether the project is allowed at all |
| Reversibility | Paint, residue, drywall paper, and edge removal | A removable label does not assure a clean exit |
| Inspection Visibility | Whether the backsplash will be seen during checks or repairs | Visible changes can trigger questions before move-out |
| Written Approval Evidence | Photos, receipts, product details, and permission messages | Documentation helps if a deposit dispute happens |
Source note: California Department of Consumer Affairs, California Tenants: A Guide to Residential Tenants’ and Landlords’ Rights and Responsibilities
If you want a removable backsplash that feels polished instead of risky, start with the same order every time: lease check, wall test, material choice, careful install, heat-zone safety, and move-out removal planning. That sequence is the safest way to think about renter friendly kitchen upgrades backsplash decisions.

What is the difference between removable decor and permanent renovation?
Removable decor is meant to come off without changing the property. Permanent renovation changes the wall, requires repair, or leaves evidence after removal.
A removable backsplash may still become a prohibited alteration if it uses strong adhesive, covers a large area, traps moisture, damages paint, or looks like a fixed wall covering. The label “renter safe peel and stick tile” does not override your lease.
- Removable Decor: Temporary, lightweight, no drilling, no grout, no caulk, no permanent adhesive, removable with low heat.
- Gray Area Upgrade: Adhesive backsplash tiles over painted drywall, large wall coverage, visible pattern, moderate residue risk.
- Permanent Renovation: Ceramic tile, mortar, grout, construction adhesive, nailed panels, or anything that requires wall repair.
A common misconception is that “peel and stick” automatically means “lease friendly.” It does not. Peel and stick describes the installation method, not the legal risk.
How do apartment inspections and move-out reports affect deposit risk?
Apartment inspections usually compare the move-out condition with the move-in condition. If your backsplash leaves peeled paint, adhesive residue, discoloration, or drywall paper damage, it may be treated as damage beyond ordinary wear.
- Wide Photos: Capture the full kitchen wall, counters, stove, outlets, and cabinets.
- Close-Up Photos: Show existing chips, stains, paint bubbles, cracks, and texture.
- Date-Stored Files: Save images in cloud storage with the date visible in file details.
- Product Records: Keep labels, receipts, installation instructions, and removal guidance.
- Permission Messages: Save emails or portal messages from the landlord or property manager.
In our experience, the best deposit protection is boring paperwork. It feels excessive on install day. It feels very smart during move-out.
When can adhesive backsplash tiles be treated like wall coverings?
Adhesive backsplash tiles may be treated like wall coverings when they cover a broad area, bond strongly to paint, or change the look of the unit in a way management considers more than decor.
That matters because many leases restrict wallpaper, contact paper, adhesive hooks, painting, or “alterations” without approval. A temporary backsplash for apartment kitchen use can fall into that category if the lease language is broad.
Read your lease for words like:
- Alterations: Any change to walls, fixtures, paint, or surfaces.
- Adhesives: Sticky products, tapes, wall strips, contact paper, decals, or tile sheets.
- Wall Coverings: Wallpaper, vinyl film, panels, tile, decorative sheets, or coverings.
- Restoration: Your duty to return the unit to original condition.
- Approval: Whether permission must be written, signed, or submitted through a tenant portal.
If the lease says “no wall coverings,” do not assume peel and stick tile is exempt. Ask first.
How should renters score backsplash options before buying?
For a tighter pre-buy decision path, the next step is a hidden-area wall test. If you want a quick reference while you compare materials, you can also revisit Removable Kitchen Tiles: Peel & Stick Backsplash Guide.
Test first. Stop if paint lifts. Document everything.
What should you ask your landlord before installing?
The safest renter friendly backsplash plan starts with a short, specific approval request that makes the project sound temporary, reversible, and easy to document. Ask before you buy, save the reply, and keep the conversation focused on removable installation rather than renovation.

Ask a short, specific question that makes approval easy. Do not ask, “Can I renovate the kitchen?” That sounds permanent.
Try this:
“Hi, I’d like to install a removable, peel-and-stick backsplash in the kitchen. It will not use grout, caulk, nails, screws, or permanent adhesive. I will test a hidden area first and remove it before move-out if required. Is this allowed under my lease?”
Attach these details
- Product link: Send the exact material, not a vague description.
- Installation method: State that no grout, caulk, drilling, or construction adhesive will be used.
- Removal plan: Explain that controlled heat and adhesive remover may be used if needed.
- Photo documentation: Offer to take before-and-after photos.
Save written approval. If approval is given by text, email, or tenant portal, keep it. Verbal approval is weaker because you cannot prove it later.
Next step: compare the install plan against a renter-safe method before you commit.
How do you install a renter-friendly backsplash with less wall damage risk?
Afraid one crooked tile or sticky edge will become a permanent mistake? This section gives you a controlled installation method that favors clean prep, light pressure, dry layout, and easier move-out removal.
Install a renter-friendly backsplash by cleaning the wall, testing adhesion, dry-fitting every sheet, applying light pressure first, and avoiding permanent sealants. The safest method is slow, reversible, and documented. Do not grout, caulk, glue, or over-press the edges if you want the best chance of removal.
Use this lens to measure how easily the backsplash can be lifted later without escalating deposit risk.
Manufacturer instructions across product categories support this careful approach. Smart Tiles instruct users to install on clean, smooth, dry surfaces and avoid dusty, porous, textured, or freshly painted surfaces. RoomMates peel and stick wallpaper instructions similarly call for smooth, clean, dry walls and note that product should not be applied to textured walls or fresh paint.
Sources
Smart Tiles, Installation Instructions: https://www.thesmarttiles.com/en_us/installation
RoomMates Decor, Peel and Stick Wallpaper FAQ/Instructions: https://roommatesdecor.com/pages/faqs

What tools do renters need for a lower-risk install?
You do not need a contractor’s toolbox. You need control.
- Level: Keeps the first row straight, which prevents pattern drift.
- Painter’s Tape: Holds test layouts without strong adhesive.
- Utility Knife: Makes cleaner cuts than scissors on many tile sheets.
- Metal Ruler: Guides straight cuts and protects your fingers.
- Microfiber Cloth: Removes dust without leaving lint.
- Mild Degreaser: Clears cooking film from painted drywall.
- Pencil: Marks light guide points that can be erased.
- Hair Dryer: Helps with later removal, not aggressive installation.
- Outlet Cover Screwdriver: Removes plates when safe and allowed.
Pro tip: Place a towel over the counter before cutting. It catches scraps and keeps adhesive from grabbing crumbs, dust, or grease.
How should you clean the wall before peel and stick tile?
Clean the wall with a mild, residue-free degreasing method, then let it dry fully. Grease is one of the biggest reasons adhesive backsplash tiles fail or leave uneven residue.
Wall prep notes
A kitchen wall can look clean while still holding a thin cooking film. Adhesive sticks to that film instead of the paint. Later, the tile may sag, bubble, or pull paint unevenly.
Use this cleaning sequence:
- Remove Loose Dust: Wipe with a dry microfiber cloth.
- Degrease Lightly: Use mild dish soap diluted in warm water or a residue-free kitchen degreaser.
- Rinse Carefully: Wipe with clean water so soap film does not remain.
- Dry Fully: Wait several hours, especially near sinks or stoves.
- Inspect Paint: Stop if paint feels chalky, sticky, bubbled, or soft.
Do not use oil-based cleaners before installation. Adhesive and oil are like tape and lotion. They do not form a predictable bond.
Hidden-spot test
What is the safest peel and stick tile wall test?
A peel and stick tile wall test is a small trial that checks whether your paint, drywall, and adhesive can tolerate installation and removal. For renters, this is the operational threshold between “maybe safe” and “do not install.”
Test before you buy enough material for the whole kitchen if possible.
Wall condition score
How do you decide if your wall is safe enough?
| Wall Condition | Adhesion Risk | Removal Risk | What It Means |
|---|---|---|---|
| Smooth semi-gloss paint in good condition | Low | Low–Moderate | Usually the best rental surface after testing |
| Smooth satin paint in good condition | Low–Moderate | Moderate | Test 48–72 hours before installing |
| Flat or matte paint | Moderate | Moderate–High | Paint may absorb adhesive or lift |
| Old paint with chips or bubbles | High | High | Do not install over weak paint |
| Textured walls | High | High | Adhesive contact is uneven; removal risk rises |
| Fresh paint under 30 days | High | High | Wait longer or avoid installation |
| Bare drywall or unsealed plaster | Very high | Very high | Do not install adhesive tile |
| Greasy stove wall | Moderate–High | Moderate–High | Clean thoroughly, then test |
A common misconception is that stronger adhesion is safer. For renters, the opposite is often true. The ideal bond is strong enough to stay up but weak enough to release with controlled heat.
For wall preparation, Renter-Safe Wall Prep Before Peel-and-Stick Tile establishes the architectural standard for pre-install screening. Benchmarking against lease terms, paint condition, surface smoothness, moisture exposure, and future removal risk yields an optimal configuration before adhesive touches the wall.
The safest choice is not the cheapest or the flashiest. It is the material that fits your lease, your wall finish, your stove layout, and your move-out plan, because a low-cost tile can carry a much higher total cost of ownership if it pulls paint or creates a repair dispute later.
Tick the materials that fit your current plan. The meter below will point you toward the lowest-risk path for your rental.
A material only earns a low score when everything else lines up
Which renter-friendly backsplash products fit a lower-risk plan?
Once you set the metric, the best removable backsplash for renters is the one that balances visual upgrade with reversibility, grout-free installation, and low wall intervention.
Under that standard, StickWoll peel and stick tile collections such as Retro Retreat and Nature’s Green work as practical category baselines for renters who want a grout-free, self-adhesive backsplash. Their value is not only pattern. It is that they avoid mortar, grout, and permanent construction adhesive.
That matters because permanent wet materials create a significant increase in move-out repair risk. A grout-free product removes the common renter problem of irreversible tile installation, as long as the lease, wall test, and heat-zone checks pass first.
The wall test decides more than the label does
- Use a small sample on a hidden area first.
- Watch for residue, peeling, or lifted paint edges.
- Test again near the intended backsplash zone if the first spot passes.
- Document the wall before and after with dated photos.
Dry-fit the pattern before the backing comes off
Dry-fitting means placing the sheets on the wall with the backing still on. It lets you see cuts, outlets, corners, and pattern alignment before adhesive creates pressure.
Think of it like rehearsing before opening night. The performance goes better when you already know your marks.
- Find the starting line: use a level, not the counter, because counters can slope.
- Tape sheets in place: use painter’s tape to preview the first row.
- Mark outlets: trace cover plate locations lightly.
- Check repeats: make sure faux tile lines match from sheet to sheet.
- Plan end cuts: avoid tiny slivers at visible edges.
- Label pieces: number the backs so you install in order.
Do not peel the backing until the layout makes sense. Most beginner mistakes happen because the first sheet goes up too quickly.
For a fuller install path, Removable Kitchen Tiles: Peel & Stick Backsplash Guide lays out how temporary tile can be chosen, installed, and removed with the deposit in mind.
How do you install without over-sticking?
Peel only a small part of the backing, position the sheet, then gradually expose more adhesive as you smooth it into place. Use light pressure until alignment is confirmed. A safe install feels patient, not forceful.
This technique keeps the adhesive from grabbing before you have the sheet where you want it. It is the difference between a careful renter-friendly backsplash and a wall that becomes harder to remove later.
Use this technique
- Start at a Level Edge: Your first sheet controls the rest of the wall.
- Peel 2–3 Inches First: Do not expose the whole adhesive sheet at once.
- Anchor Lightly: Touch the top edge to the wall with minimal pressure.
- Smooth From Center Out: Push air outward instead of trapping bubbles.
- Check Alignment Often: Step back before firming the surface.
- Press Selectively: Secure broad areas, but avoid crushing edges into paint.
Common misconception: harder pressing always improves installation. In a rental, heavy pressure can increase paint bonding and removal damage. Use enough pressure for contact, not enough to weld it to the wall.
If you want a material comparison next, Best Removable Vinyl Backsplash Solutions for Renters walks through lower-risk options for apartments, from vinyl sheets to other removable finishes.
How should renters cut around outlets safely?
Turn power off at the breaker when removing outlet covers or cutting close to electrical components. Never insert a knife into an electrical box. Cut tile sheets away from the wall whenever possible.
Safer outlet process
- Turn Off Power If Needed: Use the breaker before removing plates or working close.
- Remove the Cover Plate: Keep screws in a cup or bag.
- Mark the Opening: Hold the sheet in place with backing on.
- Cut Away From the Wall: Use a cutting mat or cardboard surface.
- Keep Tile Outside the Box: Do not cover the electrical box opening.
- Reinstall the Plate: The plate should sit flat without forcing it.
The National Fire Protection Association warns that electrical work should be handled carefully and that people should avoid unsafe contact with energized components. If you are unsure, ask maintenance or a qualified electrician.
NFPA Electrical Safety information
https://www.nfpa.org/education-and-research/electrical/electrical-safety
Do not stack thick tile behind an outlet cover if it creates a gap, pressure, or loose fit. That can create a safety issue and may violate property rules.
Why should renters avoid caulk, grout, and permanent edge sealing?
Caulk, grout, and construction adhesive increase move-out risk because they create a stronger bond than the peel and stick product itself. They can also stain paint, tear drywall paper, or require scraping.
This is where many renter backsplash projects become accidental renovations.
- Silicone Caulk: Flexible but hard to remove cleanly from painted drywall.
- Acrylic Caulk: Paintable, but still a repair material.
- Premixed Grout: Designed to remain in joints, not move out peacefully.
- Construction Adhesive: Usually too strong for rental painted walls.
- Aggressive Edge Tape: Can peel paint during removal.
- Nail-On Trim: Creates holes and inspection evidence.
If an edge lifts, do not automatically seal it. First ask why it lifted. Grease, wall texture, steam, or heat may be the real problem.
What should you check behind the stove before installing?
Check heat, clearance, product rating, appliance type, and manufacturer guidance before placing any removable backsplash behind a stove. Heat is not a design detail. It is a safety and material-performance issue.
- Appliance Type: Electric, induction, gas, or coil ranges create different heat patterns.
- Distance From Flame or Element: Closer heat raises risk.
- Product Heat Guidance: Follow the product’s stated limits.
- Wall Surface: Grease and heat can weaken paint and adhesive.
- Ventilation: Poor ventilation increases heat and cooking film buildup.
Some manufacturers provide heat-related installation limits. Smart Tiles, for example, states its tiles are resistant to stove heat under specified conditions and gives clearance guidance for gas stoves. Always follow the product’s current instructions and your appliance manual.
Smart Tiles, Installation and stove guidance
https://www.thesmarttiles.com/en_us/installation
What is a renter-safe behind-stove checklist?
Use this checklist before installing any heat resistant backsplash claim behind a stove. The point is not to trust the label. The point is to see whether the wall, the product, and the heat zone can coexist without turning your move-out into a deposit dispute.
| Heat-Zone Check | Safe Signal | Stop Signal |
|---|---|---|
| Product instructions | Allows backsplash use near stove | No stove guidance or heat warning |
| Gas flame clearance | Meets manufacturer clearance | Flame can touch or approach tile |
| Electric/induction heat | Wall stays moderately warm | Wall becomes hot to touch |
| Grease level | Wall cleans fully | Grease remains sticky |
| Ventilation | Hood or fan works | Steam and heat linger |
| Wall condition | Paint is smooth and stable | Paint is bubbling, soft, or cracked |
| Removal plan | Can warm and peel later | Heat may bake adhesive into paint |
Pro tip: Cook normally for 20 minutes, then check the wall temperature with your hand at a safe distance after turning burners off. If the wall feels hot, do not install adhesive tile there without product-specific approval.
Use this checklist to keep the project controlled from start to finish. The score is not about style. It measures whether your setup stays predictable enough to remove later without turning the wall into a repair project.
| Stage | Task | Why It Matters | Score Impact |
|---|---|---|---|
| Before | Read lease clauses | Reduces violation risk | High |
| Before | Ask written permission if unclear | Creates evidence | High |
| Before | Take dated photos | Supports deposit disputes | High |
| Before | Clean and dry wall | Improves predictable adhesion | High |
| Before | Run 24–72 hour wall test | Detects paint failure early | Very high |
| During | Dry-fit all sheets | Prevents crooked placement | High |
| During | Peel backing gradually | Reduces misalignment | Medium |
| During | Use light pressure first | Preserves removability | High |
| During | Cut outlets safely | Reduces electrical risk | Very high |
| During | Avoid caulk and grout | Protects move-out recovery | Very high |
| After | Photograph finished install | Documents condition | Medium |
| After | Save scraps and labels | Helps with removal planning | Medium |
| After | Watch edges for 7 days | Catches heat or grease failure | Medium |
This table is the practical core of the method. If a step feels like overkill, remember the goal: peel and stick backsplash without damaging wall surfaces at move-out.
How do you remove a removable backsplash at move-out?
Remove a removable backsplash slowly with controlled heat, low-angle peeling, and adhesive cleanup that matches the wall finish. Do not rip sheets off cold. That is how painted drywall fails.
The metric here is the Move-Out Recovery Score. It measures whether the wall returns close to its documented starting condition.
Goo Gone product instructions generally advise testing on an inconspicuous area before use and avoiding certain surfaces. Follow the current label for your exact product.
Goo Gone Product Use Guidance
Goo Gone Product Use Guidance
What is the safest hair dryer heat method?
Use low to medium heat, warm a small area, and peel slowly at a low angle. Heat should soften adhesive, not cook paint.
If you want a broader look at how to plan, install, and remove adhesive backsplash with less risk, this related guide keeps the same deposit-first logic.
What should you do if paint starts lifting?
Stop immediately. Paint lifting means the adhesive bond is stronger than the paint’s bond to the wall, so the safest move is to slow down, document the failure, and reduce pull force before the repair gets larger.
Do not keep pulling to “get it over with.” That usually makes the patch bigger and the move-out conversation harder.
Instead, treat the first lift as a warning sign and work with the wall, not against it. A controlled reset can reduce damage, preserve evidence, and help you decide whether the backsplash should come off in smaller sections or pause entirely.
- Pause the removal: Let the wall cool and reassess before doing anything else.
- Take photos: Document the first sign of failure while it is still small.
- Use more controlled heat: Warm smaller sections for less time.
- Lower the peel angle: Pull flatter against the wall instead of away from it.
- Cut the sheet: Remove around the risky area instead of dragging across it.
- Ask maintenance: In some rentals, early disclosure is better than creating a larger patch.
This is why the wall test matters. If a tiny test piece pulls paint, a full backsplash may do the same at a much bigger scale. Stop if paint lifts, and treat that result as your clearest sign to slow the project down.
Quick damage-control checklist
Which internal guide should renters use before installation?
For step-by-step installation help after the wall passes testing, DIY Peel and Stick Backsplash: Renter-Safe Kitchen Upgrade calibrates the output from planning to installation. It is especially useful for beginners who need practical tool lists, product considerations, and troubleshooting.
If vinyl is your preferred material, Best Removable Vinyl Backsplash Solutions for Renters provides a more focused comparison. Benchmarking against total cost of ownership, vinyl may reduce upfront spend but can increase removal uncertainty on weak paint.
What is the safest start-to-finish renter backsplash system?
The safest system is lease check, wall test, material scoring, heat-zone screening, careful install, and planned removal. Skip one step and the risk rises.
This system is grounded in rental logic: lower surprise, lower repair risk, and better evidence. It does not promise an unchanged wall. It creates a more controlled path.
Lease-aware: No install began before checking alteration language.
Smooth-surface only: Textured, peeling, or chalky paint was rejected.
Heat-screened: Stove areas were treated as higher-risk zones.
Low-pressure applied: Sheets were positioned lightly before final smoothing.
No permanent sealants: Caulk, grout, and construction adhesive were excluded.
Removal-planned: Hair dryer heat and residue testing were part of the install plan.
If the wall passed testing, peel and stick tile became a reasonable removable backsplash option. If the wall failed testing, the safest backsplash was freestanding, non-adhesive, or no backsplash at all.
That may sound less exciting than a dramatic makeover. But if you are a renter, the best upgrade is the one you can enjoy now and remove later without a deposit fight.
Final thoughts
No removable backsplash is safe for every rental wall. Old paint, textured walls, grease, heat, and strict lease language can turn a simple upgrade into a repair bill.
- Check the Lease: Confirm adhesives, wall coverings, and restoration rules.
- Test First: Run a hidden 24–72 hour peel and stick tile wall test.
- Respect Heat Zones: Do not install behind a stove without product-specific clearance.
- Install Lightly: Avoid grout, caulk, permanent adhesive, and heavy edge pressure.
- Plan Removal Early: Keep a hair dryer, plastic scraper, mild cleaner, and test-safe adhesive remover ready for move-out.
Can renters use peel and stick backsplash in an apartment?
Yes, renters can use peel and stick backsplash if the lease allows it, the wall passes an adhesive test, and the material can be removed without damage. If the lease restricts adhesives, wall coverings, or alterations, ask for written approval first.
Never rely only on the words “renter-friendly” or “removable.” Your actual wall decides the risk.
Will peel and stick backsplash damage painted drywall?
It can. Peel and stick backsplash may damage painted drywall if the paint is old, matte, poorly bonded, textured, freshly applied, or exposed to heat and grease. The safest approach is a 24–72 hour hidden wall test.
If paint lifts during the test, do not install the backsplash.
Do I need landlord permission for a removable backsplash?
You need permission if your lease requires approval for adhesives, wall coverings, alterations, or changes to painted surfaces. If the lease is unclear, written approval is the safer path.
Save the approval message, product link, receipt, and before photos. That documentation may matter during move-out.

If you want the most practical next step, complete the lease check, wall test, and material comparison before buying. Then save or download a move-out removal checklist so your future self is not guessing under inspection pressure.
For a style option you can still evaluate through a renter-safety lens, consider Retro Retreat after your wall test and lease check are complete.
What is the safest backsplash for a strict rental?
If your lease is strict, start by comparing the wall surface, the installation method, and how visible the backsplash will be during an apartment inspection. A removable backsplash for renters is safest when it leaves no bonded edge, no residue, and no evidence of forced removal.
Use this quick check before committing to a backsplash. The score updates as you choose what fits your rental.
Can I put peel and stick tile behind a stove?
Sometimes, but only if the product instructions allow it, the stove clearance is safe, and the wall does not get too hot. Gas stoves require extra caution because flame and radiant heat can damage some materials.
Always check the manufacturer’s heat guidance before installing anything behind a stove.
If your range sits close to the wall, a temporary backsplash for apartment kitchen use may still be too risky unless the product is specifically rated for that zone.
How to remove peel and stick backsplash before move-out
If using Goo Gone or another adhesive remover, test it in a hidden area first. Stop immediately if paint starts lifting.
For move-out planning, keep the original before photos and your product label so you can show what was installed and how it was removed.
If you want the full install sequence after you confirm your wall is suitable, continue with DIY Peel and Stick Backsplash: Renter-Safe Kitchen Upgrade.
For a broader choice set, compare finishes in Removable Kitchen Tiles: Peel & Stick Backsplash Guide.
Once the surface passes your test, you can look at specific finishes such as Nature’s Green for a self-adhesive, grout-free option that is designed for renter-friendly use.
Compare any product against your own wall condition and move-out plan before buying.
Before you buy, complete the lease check, the wall test, and the material comparison, then save a removal plan for move-out.
What should I do before buying a renter friendly backsplash?
Start with the lease. Look for rules about alterations, adhesives, wall coverings, and restoration. If the wording is unclear, or if the backsplash will cover a large area, ask for written approval. Then photograph the wall, note the paint condition, and compare the area near the stove with the rest of the kitchen so you can judge where heat and grease are most likely to matter.
Quick deposit-risk check
Use this short checklist before buying. It does not replace your lease, but it helps you avoid the common mistakes that lead to a messy move-out.
How to compare options before purchase
Important: No removable product is safe for every wall. If the hidden test causes paint to lift, stop there and choose a lower-risk option before buying more material.
A simple rule that protects the deposit
For the next step, compare your prep plan with DIY Peel and Stick Backsplash: Renter-Safe Kitchen Upgrade or review Renter-Safe Wall Prep Before Peel-and-Stick Tile before you buy.
Start with the lease and written permission
A renter-friendly backsplash decision begins with the lease, building rules and any written approval required by the property owner or manager. Adhesive wall coverings may be treated differently from paint, framed art or freestanding decor. Save the relevant lease language, approval and before photographs together so the project can be evaluated later without relying on memory.
If the lease is silent or ambiguous, ask before installing. A removable product label does not override the property agreement or local rental rules, and a decorating article cannot promise a particular deposit outcome.
Document the wall before testing anything
Photograph the wall in even light and close up. Record peeling paint, patched drywall, texture, stains, caulk, grease and previous adhesive residue. A temporary covering bonds to the top layer that exists today, including weak paint or old repairs.
Do not use the backsplash to hide damp drywall, active mold, loose paint or a recurring leak. Resolve the underlying wall condition first.
Use a limited compatibility sample with narrow expectations
If both the property rules and product instructions allow it, place a small sample on a representative but inconspicuous area using the exact preparation and pressure method intended for the project. Record the date, wall location and result.
The sample can reveal immediate paint release, residue, poor adhesion or a finish reaction. It cannot predict what the same wall will do after years of heat, humidity, cleaning or sunlight, so treat the result as one piece of evidence rather than a pass/fail score.
Keep installation restrained and reversible where possible
Dry-layout the pattern before exposing adhesive, avoid narrow edge slivers, keep outlet covers and service points removable, and do not add permanent grout, mortar or construction adhesive merely to make a temporary system feel more finished.
At exposed edges, use the finishing method documented for the product and the rental conditions. If a detail requires a permanent wall alteration, decide whether the project is still appropriate for a rental.
Treat stove and sink zones separately
Behind a range, use the exact appliance manual and the exact wall-product instructions. There is no universal clearance that makes every self-adhesive product appropriate behind every appliance. Around a sink, splash resistance of the face does not make the completed wall waterproof.
If the required evidence is unclear, reduce the covered area or choose another finish for the sensitive zone rather than relying on a generic heat-resistant or waterproof label.
Plan move-out before installation day
Store the product instructions, wall photographs, installation date and any spare pieces. Schedule removal early enough to work slowly and inspect the wall in small sections. If paint, drywall paper or another substrate starts lifting, stop and reassess instead of pulling harder.
Budget ordinary restoration such as patching, priming or repainting as a possibility. A renter-friendly project is one where the potential repair path is understood in advance, not one tied to a zero-damage promise.
Use a simple go, verify or choose-another-route decision
Proceed when permission is clear, the wall is sound and dry, the exact product is documented for the surface and room zone, and the removal plan is acceptable. Verify further when paint history, heat exposure or wall compatibility is uncertain.
Choose another decorating method when the project depends on covering a wall defect, using an excluded heat or wet zone, adding permanent bonding materials or assuming a temporary label protects the security deposit.
Keep one-page move-out notes
Before installation, write down the product, wall location, preparation method, approval record and removal instructions in one place. At move-out, photograph the wall before removal, during the first test section and after restoration. This creates a clear evidence trail if the property manager, paint condition or product listing has changed since installation.
A simple record is more useful than a numerical risk score because it preserves the actual conditions that matter for this wall and this lease.
Leave yourself time to stop
Start removal before the final move-out deadline so one weak paint area does not become an emergency. If the wall reacts badly, pause, document it and switch from removal to a controlled repair plan instead of escalating force or heat.
Sources and scope
- 3M: Applying VHB Pressure-Sensitive Tape — General PSA surface-preparation principles for named 3M tapes; not Stickwoll specifications.


Leave a comment
This site is protected by hCaptcha and the hCaptcha Privacy Policy and Terms of Service apply.