


Moderner DIY-Leitfaden für Peel and Stick Kitchen Backsplash 2025
Stellen Sie sich vor, Sie würden Ihre gesamte Küche an nur einem Wochenende aufwerten. Kein Fugenmörtel, kein Staub, keine Handwerkerkosten. Das ist kein ferner Traum, sondern die neue Realität für clevere Hausbesitzer. Tatsächlich ist die Nachfrage so hoch, dass Branchenanalysen zeigen, dass die DIY-Backsplash-Verkäufe allein im Jahr 2024 um schätzungsweise 40% gestiegen sind. Dieser Anstieg geht nicht nur auf die Ersparnis zurück, sondern auch auf ein zugängliches, wirkungsstarkes Design.
Eine veraltete oder wenig inspirierende Küche kann das ganze Zuhause müde wirken lassen. Der Gedanke an eine traditionelle Renovierung – mit ihren hohen Kosten, dem Dreck und dem langen Zeitplan – reicht oft aus, um die meisten Projekte zu stoppen, bevor sie überhaupt beginnen. Genau hier kommen moderne peel and stick backsplashes ins Spiel und bieten eine revolutionäre Kombination aus Einfachheit, Erschwinglichkeit und anspruchsvollem Design.
Was ist der beste Weg, einen kitchen backsplash im Jahr 2025 zu modernisieren?
Der beste Weg, einen kitchen backsplash im Jahr 2025 zu modernisieren, ist die Verwendung hochwertiger peel and stick tiles. Diese selbstklebenden Lösungen bieten eine schnelle, erschwingliche und langlebige Alternative zu traditionellen Fliesenarbeiten. Zu den Top-Optionen gehören hitzebeständige metal tiles für Bereiche hinter dem Herd, wasserfestes Vinyl für den Bereich rund um das Spülbecken und eco-friendly materials für eine nachhaltige Wahl.
Dieser Leitfaden ist Ihre Expertenquelle, um sich in diesem spannenden Trend zurechtzufinden. Wir sehen uns die Top-Stile für 2025 an, vergleichen die besten Materialien in Sachen Haltbarkeit und führen Sie Schritt für Schritt zu einer makellosen Installation. Sehen wir uns an, warum peel and stick backsplashes das Küchendesign im Jahr 2025 neu definieren.
Warum dominieren peel and stick backsplashes die Küchentrends 2025?
Die Frage: Fühlen Sie sich mit einer veralteten Küche festgefahren, sind aber von der Vorstellung einer Komplettsanierung überwältigt?
Das Versprechen: Dieser Abschnitt erklärt, warum peel and stick tiles die clevere, stilvolle und praktische Lösung sind, nach der Sie gesucht haben.
Das starke Wachstum von peel and stick backsplashes beruht auf einem grundlegenden Wandel in den Prioritäten von Hausbesitzern. Heute legen wir mehr Wert denn je auf Schnelligkeit, Kosteneffizienz und Designflexibilität. Diese selbstklebenden tiles überzeugen in all diesen Bereichen und sind damit eine klare Wahl für 2025 und darüber hinaus.
Was früher als provisorische Lösung galt, ist heute eine langlebige, langfristige Lösung. Fortschritte in der Klebetechnologie und Materialwissenschaft bedeuten, dass hochwertige peel and stick Produkte jahrelang halten können und Hitze, Feuchtigkeit sowie täglicher Abnutzung mit beeindruckender Widerstandsfähigkeit standhalten. Sie geben Hausbesitzern die Möglichkeit, selbst als Designer aufzutreten und einen professionellen Look ohne den professionellen Preis zu erzielen.
Das überzeugendste Argument ergibt sich im direkten Vergleich mit traditionellen Fliesen. Als Experten für Renovierungen sehen wir Kunden oft mit genau dieser Entscheidung ringen. Der Unterschied im Umfang des Projekts ist enorm.
Traditionell vs. Peel and Stick: Ein Vergleich 2025
| Merkmal | Traditionelle Fliesen-Rückwand | Moderne Peel-and-Stick-Backsplash |
|---|---|---|
| Installationszeit | 2–5 Tage (einschließlich Trocknungs-/Aushärtezeit) | 2–6 Stunden |
| Durchschnittliche Kosten (30 sq. ft.) | 900 $ - 2.500 $ (mit Arbeitskosten) | 150 $ - 500 $ (DIY) |
| Erforderliches Schwierigkeitsniveau | Mittelstufe bis Fortgeschrittene | Anfänger |
| Unordnung & Störungen | Hoch (Abbruch, Dünnbettmörtel, Fugenmörtel) | Minimal (Oberflächenreinigung) |
| Entfernbarkeit | Schwierig und zerstörerisch | Mit Wärme möglich (Haartrockner) |
Diese Daten machen die Entscheidung für viele klar. Sie sparen nicht nur Geld, sondern gewinnen auch Ihr Wochenende zurück und vermeiden eine große Störung Ihres Alltags. Es ist ein Upgrade mit großer Wirkung bei minimalem Aufwand. Um Ihnen die Entscheidung zwischen verschiedenen Materialien und Methoden zu erleichtern, haben wir alles in unserem umfassenden Leitfaden für What Kitchen Backsplash Tile aufgeschlüsselt, der peel-and-stick Lösungen mit traditionellen Installationen in Bezug auf Stil, Komfort und Budget vergleicht.

Wie wähle ich den besten peel and stick backsplash für meine Küchenwände aus?
Die Frage: Sind Sie von all den verfügbaren Material- und Stiloptionen überwältigt und befürchten, die falsche Wahl zu treffen?
Das Versprechen: Hier zeigen wir dir die besten Materialien und helfen dir, einen Stil zu finden, der perfekt zu deiner modernen Küchenästhetik passt.
Die Wahl des richtigen Materials ist die wichtigste Entscheidung, die du treffen wirst. Sie beeinflusst nicht nur die Optik, sondern auch die Haltbarkeit und Leistung deines neuen backsplash. Vergiss die dünnen, plastikartig wirkenden Optionen von früher. Der Markt 2025 ist voller anspruchsvoller, leistungsstarker Lösungen.
Vinylfliesen
Vinyl ist das beliebteste und vielseitigste Material. Moderne Luxury Vinyl Tiles (LVT) sind dick, strukturiert und verfügen über hyperrealistische 3D-Grafiken, die Keramik, Stein und sogar Holz überzeugend nachahmen. Sie sind waterproof, leicht zu reinigen und extrem langlebig – damit sind sie eine fantastische Allround-Wahl.
Metall- und Metalloptik-Fliesen
Für einen eleganten, industriellen oder professionellen Küchenlook sind metal tiles unschlagbar. Oft mit einer Oberfläche aus Aluminiumverbund gefertigt, sind diese Fliesen von Natur aus heat-resistant und leicht abzuwischen. Sie sind in Ausführungen wie gebürstetem Edelstahl, Kupfer und mattschwarz erhältlich und verleihen einen Hauch moderner Raffinesse.
Gel- und Harzfliesen
Diese Fliesen haben eine 3D-Gel-Oberfläche (oft als Epoxid bezeichnet), die ihnen die glänzende, räumliche Optik von echtem Glas- oder Keramikfliesen verleiht. Die „puffy“ Struktur erzeugt schöne Lichtreflexe und verleiht deinen Wänden mehr Tiefe. Sie sind eine großartige Wahl, wenn du etwas Funkeln hinzufügen möchtest, und lassen sich sehr leicht zuschneiden und installieren.
Natürliche und umweltfreundliche Materialien
Die Nachfrage nach nachhaltigem Design hat beeindruckende Innovationen hervorgebracht. Heute findest du peel and stick tiles aus recycelten Materialien, Natursteinfurnieren und sogar Kork. Diese Optionen bieten einzigartige Texturen und ein gutes Gefühl für umweltbewusste Hausbesitzer.
Ein weit verbreitetes Missverständnis ist, dass alle peel and stick tiles „billig“ aussehen. Aus unserer Erfahrung liegt das Problem nicht in der Produktkategorie, sondern in der Produkt*qualität*. In eine Premium-Marke mit dickeren Fliesen und stärkerem Kleber zu investieren, macht den entscheidenden Unterschied und sorgt für ein Finish, das von traditionellen Materialien oft nicht zu unterscheiden ist.
Für einen umfassenden Überblick über die leistungsstärksten Optionen ist unsere datenbasierte Zusammenstellung die beste Anlaufstelle.
Empfehlungsanker:
Um einen direkten Vergleich von Haltbarkeit, Preis und Stil zu sehen, ist unser Leitfaden zu den Besten Peel and Stick Tiles für Kitchen Backsplash 2025 der definitive Ausgangspunkt für jedes DIY-Projekt.

Wie läuft die Schritt-für-Schritt-Installation eines peel and stick backsplash ab?
Die Frage: Bist du nervös, bei der Installation etwas falsch zu machen und am Ende schiefe Fliesen oder ein sich ablösendes Durcheinander zu haben?
Das Versprechen: Folge dieser einfachen, von Profis empfohlenen Anleitung, um von Anfang bis Ende eine makellose Installation sicherzustellen.
Der Reiz eines DIY peel and stick backsplash liegt in seiner Einfachheit. Denk weniger an Bauarbeiten und mehr an ein präzises Handwerksprojekt. Ein erfolgreiches Ergebnis hängt vor allem von geduldiger Vorbereitung und sorgfältiger Ausrichtung ab. Ein kleines Küchenprojekt lässt sich tatsächlich an einem Nachmittag erledigen.
Oberflächenvorbereitung (Der wichtigste Schritt)
Überspringe diesen Schritt nicht. Der Kleber braucht eine saubere, glatte und trockene Oberfläche, um eine dauerhafte Verbindung aufzubauen. Reinige deine Wand mit einem entfettenden Reiniger (eine 50/50-Mischung aus Isopropylalkohol und Wasser funktioniert gut), um Fett oder Rückstände zu entfernen. Lass die Wand mindestens eine Stunde lang vollständig trocknen.
Messen und planen
Miss die gesamte Fläche aus, um sicherzustellen, dass du genügend Fliesen hast (kaufe immer 10% extra für Zuschnitte und Fehler). Plane deinen Startpunkt. Die meisten Profis beginnen in der am stärksten sichtbaren Ecke und arbeiten sich von dort nach außen vor. Lege ein paar Fliesen auf die Arbeitsplatte, um das Muster und die Überlappung zu visualisieren.
Profi-Tipp: Bevor du eine Trägerfolie abziehst, mache einen „Trockenanpassung“. Halte ein komplettes Blatt an die Wand, um zu sehen, wie es sich mit Steckdosen, Ecken und Kanten ausrichtet. So kannst du deine Schnitte ohne Druck planen.
Ziehe eine gerade Hilfslinie
Ihre Arbeitsplatten oder Schränke sind möglicherweise nicht perfekt eben. Verwenden Sie eine Wasserwaage und einen Bleistift, um eine gerade horizontale Linie dort zu ziehen, wo die Ober- oder Unterkante Ihrer ersten Fliesenreihe verlaufen soll. Diese Richtlinie ist Ihr Maßstab und hält das gesamte Projekt gerade.
Abziehen, ausrichten und aufkleben
Ziehen Sie nur die obersten wenigen Zentimeter des Trägerpapiers ab. Richten Sie die Fliese an Ihrer Richtlinie aus, nicht an der Arbeitsplatte. Sobald sie perfekt positioniert ist, drücken Sie die freiliegende Klebefläche fest an die Wand. Ziehen Sie dann langsam den restlichen Träger ab, während Sie die Fliese von oben nach unten glattstreichen.
Überlappen und Druck ausüben
Die meisten peel and stick tiles sind mit einem kleinen Überlappungsbereich ausgestattet, um eine nahtlose, wasserfeste Abdichtung zu schaffen. Achten Sie darauf, diese Überlappung exakt mit der vorherigen Fliese auszurichten. Sobald ein Element sitzt, verwenden Sie einen Kunststoffglätter oder eine kleine Rolle, um über die gesamte Oberfläche festen, gleichmäßigen Druck auszuüben. Dadurch wird der druckempfindliche Klebstoff aktiviert.
Zuschneiden und fertigstellen
Für Ausschnitte um Steckdosen oder Fenster erstellen Sie eine Papierschablone der Fliese und schneiden Sie sie passend zum Hindernis zu. Übertragen Sie diese Schablone auf Ihre Fliese und schneiden Sie vorsichtig mit einem scharfen Cuttermesser und einem Lineal. Sobald alle Fliesen installiert sind, drücken Sie ein letztes Mal fest über alle Fugen.
Für eine noch detailliertere Schritt-für-Schritt-Anleitung und Tipps zum Umgang mit schwierigen Ecken bietet unser kompletter Leitfaden zu wie man peel and stick tiles installiert fortgeschrittene Techniken für ein professionelles Ergebnis.
Kann man ein peel and stick backsplash hinter einem Herd sicher verwenden?
Die Frage: Machen Sie sich Sorgen, dass ein peel and stick backsplash hinter einem heißen Herd oder in der Nähe eines Spülbeckens schmelzen, sich verformen oder sogar eine Brandgefahr darstellen könnte?
Das Versprechen: Dieser Abschnitt erklärt, welche Materialien sicher sind und welche Vorsichtsmaßnahmen Sie bei der Verwendung in Bereichen mit hoher Hitze und Feuchtigkeit beachten müssen.
Dies ist eine der häufigsten und wichtigsten Fragen, die wir von Hausbesitzern erhalten. Die Antwort lautet ja, Sie können peel and stick tiles absolut hinter einem Herd und Spülbecken verwenden, aber Sie *müssen* das richtige Material wählen und bestimmte Sicherheitsrichtlinien einhalten.
Hitzebeständigkeit: Hinter dem Herd
Der Schlüssel liegt darin, nach Materialien zu suchen, die ausdrücklich für Hitzebeständigkeit ausgelegt sind.
- ✓Beste Wahl: Metallfliesen. Fliesen mit einer echten Oberfläche aus Aluminium oder Edelstahl sind die Top-Performer. Metall leitet Wärme effektiv ab und verhindert, dass das Material anbrennt oder sich verzieht.
- ✓Gute Wahl: Premium-Vinyl & Steinverbund. Viele hochwertige Vinyl- und Steinverbundfliesen sind so ausgelegt, dass sie der Umgebungswärme eines Kochfelds standhalten. Prüfen Sie immer die Herstellerangaben zu den Temperaturgrenzen.
Eine wichtige Faustregel ist der Abstand. Als Sicherheitsstandard empfehlen wir, sicherzustellen, dass zwischen der Rückseite Ihres Herdes und der Wand mindestens 6-8 inches Platz sind. Bei Gasherden mit offenen Flammen ist dieser Abstand nicht verhandelbar. Bei Induktions- oder Elektrokochfeldern haben Sie etwas mehr Spielraum, aber die Prüfung der Materialspezifikationen bleibt dennoch entscheidend.
Feuchtigkeitsbeständigkeit: Rund um das Spülbecken
Fast alle hochwertigen peel and stick tiles aus Vinyl, Metall oder Gel sind 100% wasserfest. Die eigentliche Schwachstelle ist nicht die Oberfläche der Fliese, sondern die Fugen. Deshalb ist der Installationsprozess so wichtig. Eine saubere Oberfläche und eine dichte, überlappende Fuge schaffen eine wasserdichte Barriere, die verhindert, dass Feuchtigkeit hinter die Fliesen gelangt.
Manche Hausbesitzer tragen eine dünne Raupe aus transparentem Silikon an der Stelle auf, an der der backsplash auf die Arbeitsplatte trifft, um zusätzliche Sicherheit zu haben. Auch wenn dies bei hochwertigen Fliesen nicht immer notwendig ist, ist es ein einfacher Schritt, der eine perfekte Abdichtung im nassesten Bereich Ihrer Küche garantiert.
Bereit? Jetzt hitze- und wasserbeständige Fliesen findenGibt es umweltfreundliche und nachhaltige peel and stick Optionen?
Die Frage: Möchten Sie Ihre Küche modernisieren, sind aber besorgt über die Umweltauswirkungen synthetischer Materialien?
Das Versprechen: Entdecken Sie eine neue Generation schöner, nachhaltiger peel and stick backsplashes aus recycelten und ungiftigen Materialien.
Der Trend zu gesünderen, nachhaltigeren Häusern hat den peel and stick Markt inzwischen eindeutig erreicht. Als Reaktion auf die wachsende Nachfrage der Verbraucher – Berichten zufolge priorisieren inzwischen über 60% der Renovierer umweltfreundliche Produkte – haben Hersteller einige beeindruckende Optionen entwickelt.
Recycelte und ungiftige Materialien
Achten Sie auf Produkte aus recyceltem PET (dem gleichen Kunststoff, der auch für Wasserflaschen verwendet wird) oder anderen Materialien aus dem Post-Consumer-Bereich. Diese Fliesen halten Abfall von Deponien fern und haben oft eine schöne, hochwertige Oberfläche. Eine weitere aufkommende Kategorie ist Natursteinfurnier, bei dem unglaublich dünne Schichten aus echtem Schiefer oder Quarzit verwendet werden, wodurch der Abbauaufwand reduziert wird.
Klebstoffe mit niedrigem VOC-Gehalt
Eines der größten Anliegen bei jedem Baumaterial ist die Raumluftqualität. Flüchtige organische Verbindungen (VOCs) sind Chemikalien, die aus Klebstoffen und Kunststoffen in die Luft abgegeben werden können. Seriöse Marken verwenden inzwischen Klebstoffe mit niedrigem oder keinem VOC-Gehalt, wodurch ihre Produkte für Ihr Zuhause deutlich sicherer werden. Achten Sie stets auf Produktdetails und Zertifizierungen wie Greenguard Gold.
Überlegungen zum Lebenszyklus
Nachhaltigkeit betrifft nicht nur das Material, sondern auch die gesamte Lebensdauer des Produkts. Das geringe Gewicht von peel and stick tiles reduziert den CO₂-Fußabdruck beim Versand. Außerdem können sie oft direkt über vorhandene Oberflächen installiert werden und vermeiden so den Deponieabfall, der bei Abrissarbeiten entsteht. Wenn ein Wechsel ansteht, lassen sich viele ohne aggressive Chemikalien entfernen.

Wie pflege ich peel and stick backsplashes, und welche Fehler sollte ich vermeiden?
Die Frage: Wie kann ich sicherstellen, dass mein neuer backsplash möglichst lange hält und auch nach Jahren noch gut aussieht?
Das Versprechen: Lernen Sie die einfachen Pflegegeheimnisse und die häufigsten Installationsfehler kennen, die Sie für maximale Langlebigkeit und Haltbarkeit vermeiden sollten.
Ein verbreiteter Irrglaube ist, dass peel and stick backsplashes eine vorübergehende, fragile Lösung sind. Bei fachgerechter Installation und einfacher Pflege kann ein hochwertiges Produkt problemlos 5–10 Jahre oder sogar länger halten. Wir haben Kunden, deren backsplashes in viel genutzten Familienküchen über ein Jahrzehnt lang makellos aussahen.
Einfache Reinigung und Pflege
Das Geheimnis für Langlebigkeit ist eine schonende Reinigung. Verwenden Sie niemals Scheuerschwämme, aggressive Chemikalien oder Bleichmittel, da diese die Oberfläche stumpf machen und beschädigen können.
- ✓Der perfekte Reiniger: Eine einfache Lösung aus warmem Wasser mit ein paar Tropfen mildem Spülmittel reicht völlig aus.
- ✓Das richtige Werkzeug: Verwenden Sie ein weiches Tuch oder einen Schwamm. Bei Fettspritzern hinter dem Herd lassen Sie das Seifenwasser eine Minute einwirken, bevor Sie es vorsichtig abwischen.

Häufige Fehler, die Sie vermeiden sollten
Aus unserer Erfahrung sind fast alle „Produktfehler“ in Wirklichkeit Installationsfehler. Vermeiden Sie diese häufigen Stolperfallen:
- 1.Die Untergrundvorbereitung überspringen: Fliesen auf eine fettige, staubige oder feuchte Wand zu kleben, ist der häufigste Grund für das Ablösen. Die Wand muss vollkommen sauber und trocken sein.
- 2.Die Richtlinie ignorieren: Wenn Sie Ihrem Auge statt einer Wasserwaage vertrauen, entsteht ein schiefes Muster, das mit jeder weiteren Fliese noch deutlicher wird.
- 3.Auf frische Farbe aufbringen: Frische Farbe braucht Zeit zum Aushärten, in der Regel 2–3 Wochen. Werden die Fliesen zu früh angebracht, kann der Klebstoff versagen, während die Farbe ausgast.
- 4.Auf strukturierten Wänden verwenden: Die meisten peel and stick tiles benötigen eine glatte Oberfläche. Wenn Sie strukturierte Wände haben (etwa mit einer „Orangenhaut“-Oberfläche), müssen Sie diese vor der Installation glatt schleifen und grundieren.
Das Vermeiden dieser einfachen Fehler ist der Schlüssel zu einem professionell wirkenden, langlebigen Ergebnis. Weitere Tipps, darunter mietfreundliche Tricks und die neuesten Designtrends, finden Sie in unserem Leitfaden zu DIY Peel and Stick Tiles: Einfache Küchenmodernisierung.
Finden Sie Ihren perfekten backsplash-Stil!
Was ist das Hauptziel für Ihr Küchen-Update?
Was sind einige moderne Designideen für ein Küchen-Makeover?
Die Frage: Brauchen Sie etwas Inspiration, um zu sehen, wie diese Fliesen in einer echten Küche einen wirklich hochwertigen, Designer-Look schaffen können?
Das Versprechen: Entdecken Sie beeindruckende Vorher-nachher-Verwandlungen und erfahren Sie, wie Sie Backsplash Tiles mit Ihren Schränken und Arbeitsplatten kombinieren können.
Das Beste an peel and stick Tiles ist die kreative Freiheit, die sie bieten. Sie können 2025 angesagte Designer-Ästhetiken erreichen, ohne den hohen Preis zu zahlen. Der Schlüssel ist, den Backsplash als zentralen Bestandteil Ihrer gesamten Küchen-Designpalette zu betrachten.
Vorher & Nachher: Die Kraft der Verwandlung
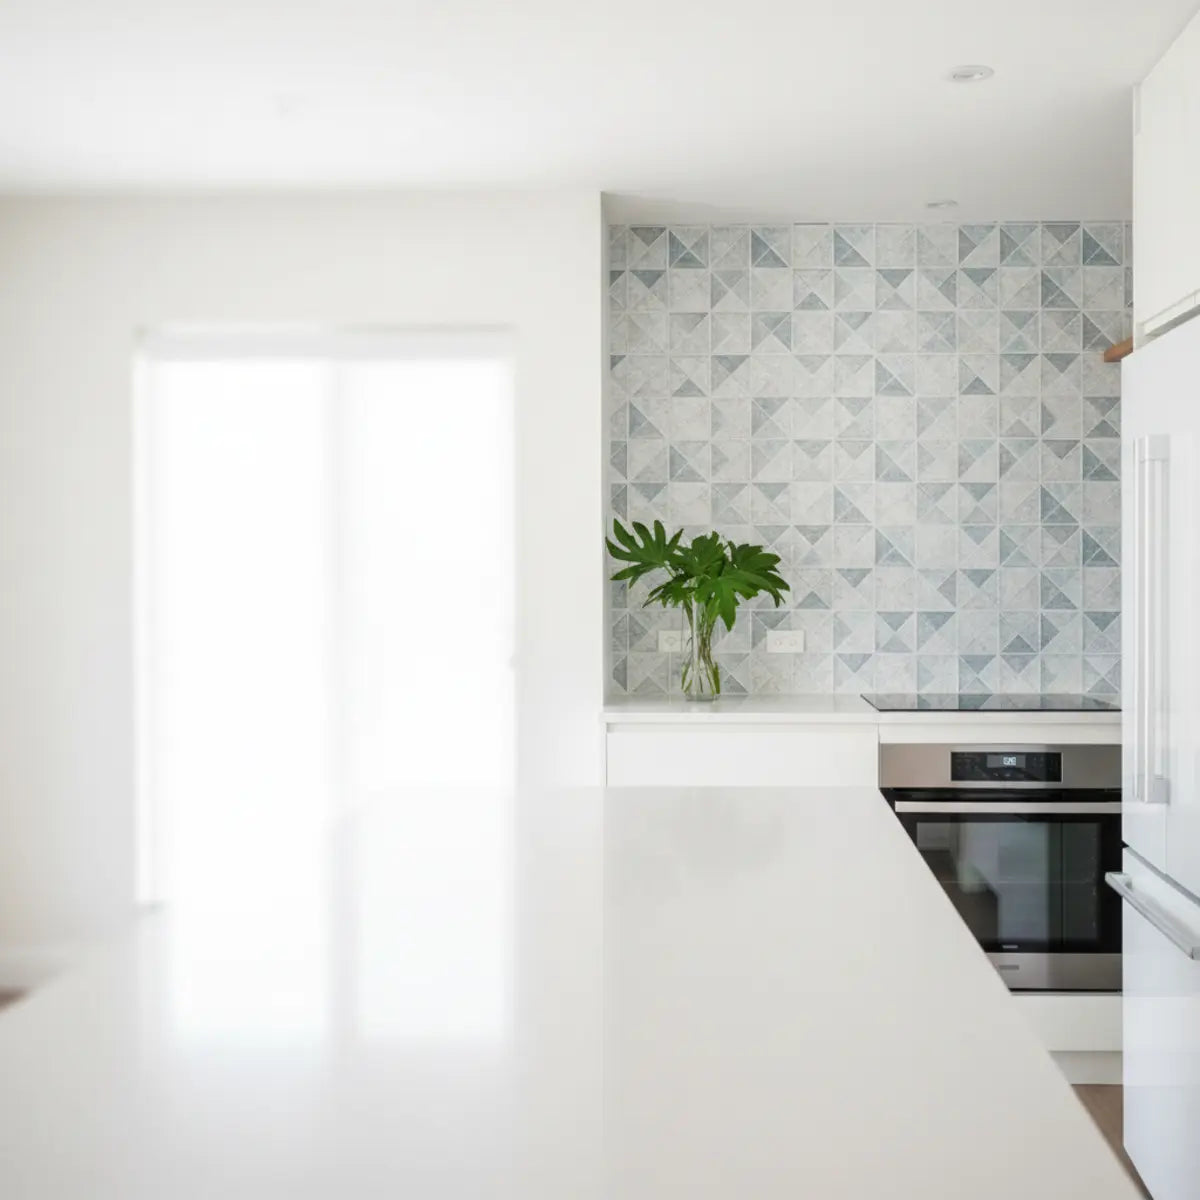
Stellen Sie sich eine kleine Küche mit veralteten, beigefarbenen Laminatarbeitsplatten und schlichten weißen Wänden vor. Sie wirkt eng und uninspiriert. Nun stellen Sie sich dieselbe Küche nach einem Wochenendprojekt vor: Ein neuer Backsplash aus glänzenden, tiefgrünen Subway Tiles wurde installiert. Die Farbe verleiht Tiefe und Persönlichkeit und lässt den ganzen Raum bewusst gestaltet und maßgeschneidert wirken. Genau solch eine wirkungsvolle Veränderung ist möglich. Für Beispiele aus der Praxis zeigt unsere Galerie von Küchenverwandlungen mit peel and stick Tiles einige dramatische Ergebnisse.
Kombination mit Schränken und Arbeitsplatten
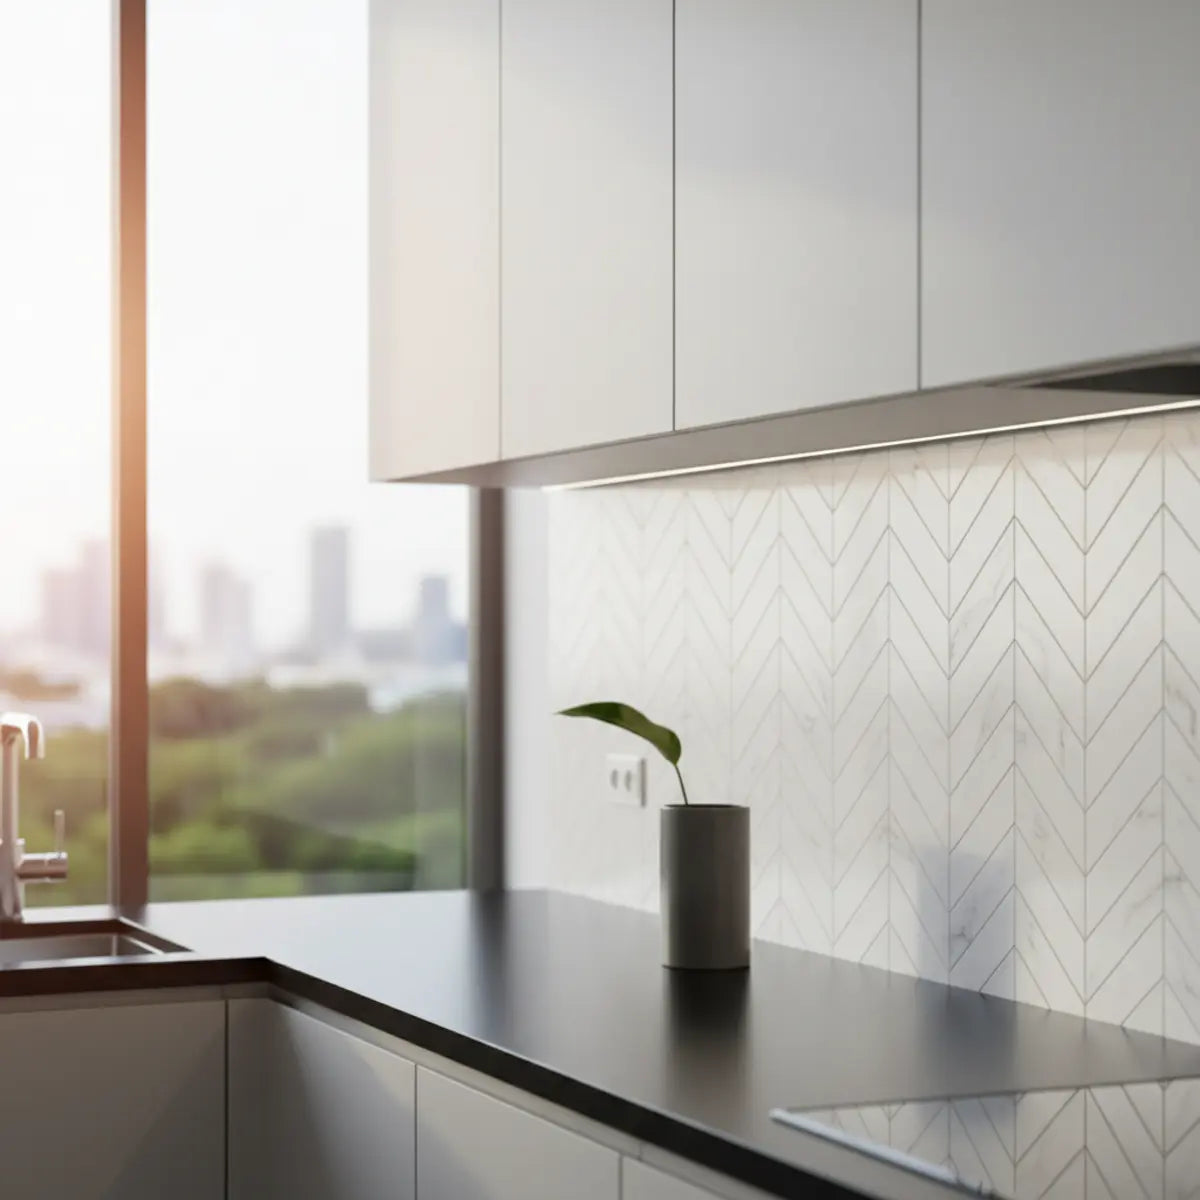
- ✓Für weiße Schränke: Ihnen stehen unzählige Möglichkeiten offen. Eine Fliese in Marmoroptik mit grauer Maserung sorgt für einen klassischen, eleganten Look. Für ein mutigeres Statement probieren Sie eine gemusterte Fliese in Schwarz-Weiß oder einen Farbakzent.
- ✓Für Holzschränke: Um die Wärme von Holz zu unterstreichen, wählen Sie Fliesen in erdigen Tönen, cremigem Weiß oder sogar ein elegantes Matt-Schwarz für einen dramatischen Kontrast.
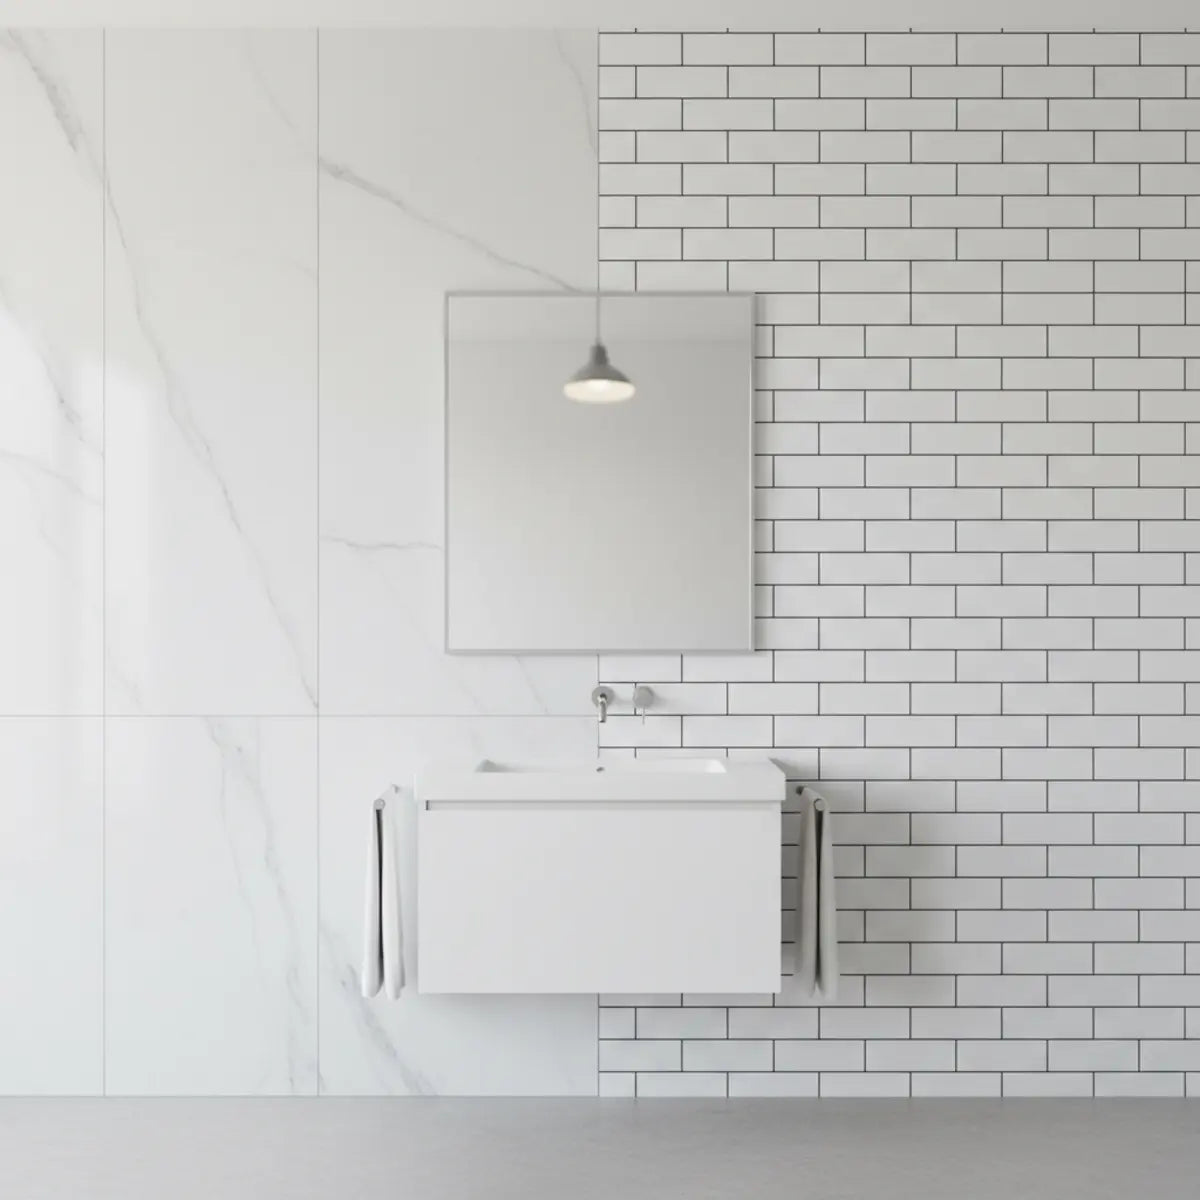
- ✓Für dunkle Schränke (Schwarz, Navy): Eine helle weiße Subway Tile (klassisch oder im Picket-Format) kann einen beeindruckenden, klaren Kontrast schaffen. Alternativ kann eine Metal Tile in Messing- oder Kupferoptik Wärme und einen Hauch von Luxus hinzufügen.
Lassen Sie Ihrer Kreativität freien Lauf
Haben Sie keine Angst, über den Tellerrand hinauszudenken. Sie können zwei verschiedene Fliesenfarben verwenden, um hinter dem Herd einen Akzentbereich zu schaffen, oder verschiedene Formen kombinieren, um ein individuelles Muster zu gestalten. Die niedrigen Kosten und die einfache Installation machen es zu einer risikoarmen Möglichkeit, mit mutigen Designideen zu experimentieren. Für weitere Inspiration kann ein Blick auf trendige Küchenwandideen für 2025 Ihr nächstes Projekt anstoßen.
Wo finde ich preisgünstige peel and stick Backsplashes?
Die Frage: Sie lieben die Idee eines Küchen-Updates, müssen aber ein knappes Budget einhalten?
Das Versprechen: Wir zeigen Ihnen, wie Sie einen hochwertigen Look für weniger Geld bekommen, einschließlich einer Kostenaufstellung und der besten Einkaufsmöglichkeiten.
Einer der größten Vorteile eines DIY Backsplash ist seine Erschwinglichkeit. Sie können eine dramatische Küchenverwandlung zu einem Bruchteil der Kosten einer professionellen Renovierung erreichen. Ein guter Preis bedeutet nicht, dass Sie bei der Qualität Abstriche machen müssen; es geht darum, klug einzukaufen.
Top preisgünstige Produktlinien
Während Premiummarken eine höhere Haltbarkeit bieten, liefern viele budgetfreundliche Linien großer Baumärkte ein ausgezeichnetes Preis-Leistungs-Verhältnis. Achten Sie auf Marken mit vielen positiven Bewertungen und Kundenfotos. Diese geben Ihnen einen realistischen Eindruck vom fertigen Look.
Die besten Einkaufsmöglichkeiten
Sie finden eine große Auswahl an peel and stick Tiles in Baumärkten wie Home Depot und Lowe's sowie auf Online-Marktplätzen wie Amazon und Wayfair. Für kuratiertere und einzigartige Designs bieten spezialisierte Online-Händler wie Stickwoll oft exklusive Stile und Muster, die Sie sonst nirgendwo finden.
Profi-Tipp: Bestellen Sie immer zunächst eine einzelne Fliese als Muster, bevor Sie sich für ein komplettes Projekt entscheiden. So können Sie Farbe, Struktur und Dicke in der Beleuchtung Ihrer eigenen Küche prüfen. Die geringe Investition für ein Muster kann Sie vor einem teuren Fehlkauf bewahren.
Kostenübersicht: DIY vs. professionelle Installation
Schauen wir uns einen typischen 30-Quadratfuß-Backsplash-Bereich an (eine gängige Größe für eine kleine bis mittelgroße Küche):
| Kostenpunkt | DIY Peel and Stick | Professionelle traditionelle Fliesen |
|---|---|---|
| Materialien | 150 $ - 500 $ | 300 € - 800 € |
| Arbeit | 0 € | 600 € - 1.500 €+ |
| Werkzeuge/Materialien | ~30 $ (Messer, Wasserwaage) | ~100+ $ (Säge, Kelle usw.) |
| Gesamt | 180 $ - 530 $ | 1.000 $ - 2.400+ $ |
Die Ersparnis ist unbestreitbar. Für die Kosten eines einzigen Abends außer Haus können Sie das Aussehen und die Atmosphäre Ihrer Küche komplett verändern. Wenn Sie bereit sind, Ihr Projekt zu starten, steckt unser DIY Peel-and-Stick-Küchenratgeber voller weiterer Tipps für ein erfolgreiches und budgetfreundliches Upgrade.
Ihr Küchen-Upgrade fürs Wochenende wartet
Wie wir gesehen haben, sind die Vorteile moderner peel and stick backsplashes eindeutig. Sie bieten eine unschlagbare Kombination aus Designflexibilität, Erschwinglichkeit und einfacher Installation und passen damit perfekt zu den Anforderungen des Wohndesigns 2025. Sie müssen nicht länger mit einer Küche leben, die Sie nicht inspiriert.
Mit hitzebeständigen Materialien für den sicheren Einsatz hinter dem Herd, wasserfesten Optionen für den Bereich am Spülbecken und einer wachsenden Auswahl an nachhaltigen Lösungen gibt es für jeden Stil und jedes Budget die passende Option. Mit den Expertentipps aus diesem Guide sind Sie bereit, Ihre eigene DIY-Küchenverwandlung zu beginnen.
Um den perfekten Einstieg zu finden und Ihre Inspiration zu wecken, entdecken Sie unsere kuratierte Liste mit Peel-and-Stick-Backsplash-Küchenideen für 2025 oder abonnieren Sie die neuesten Designtrends und Produkteinführungen direkt in Ihrem Posteingang.
Häufig gestellte Fragen
Kann ich peel and stick backsplash über vorhandene Fliesen anbringen?
Ja, in den meisten Fällen können Sie das. Entscheidend ist, dass die vorhandene Oberfläche eben, sauber und nicht porös ist. Wenn Ihre aktuellen Fliesen tiefe Fugen haben, müssen Sie diese möglicherweise mit einer dünnen Schicht Fugenmasse auffüllen und glatt schleifen, damit eine gleichmäßige Oberfläche entsteht, auf der die neuen Fliesen haften können.
Ist ein peel and stick backsplash eine gute Option für Mieter?
Es ist eine der besten Optionen für Mieter. Da sie sich wieder entfernen lassen (meist mit Hilfe eines Föhns, um den Kleber zu erwärmen), bieten sie eine Möglichkeit, den Raum zu personalisieren, ohne dauerhafte Veränderungen vorzunehmen. Prüfen Sie immer die Produktspezifikationen, da einige hochfeste Klebstoffe als semipermanent gelten.
Was mache ich, wenn ich eine Fliese schief angebracht habe?
Handeln Sie schnell! Die meisten Klebstoffe sind druckempfindlich und lassen nur ein kurzes Zeitfenster zum Neujustieren. Wenn Ihnen der Fehler sofort auffällt, können Sie die Fliese oft vorsichtig abziehen und neu ausrichten. Wenn sie fest angedrückt wurde, versuchen Sie, sie mit einem Föhn zu erwärmen, um den Kleber zu lösen, bevor Sie sie vorsichtig ablösen.
Wirken peel and stick backsplashes in echt billig?
Das war bei älteren Produkten zwar ein berechtigter Einwand, doch bei modernen, hochwertigen Fliesen ist das nicht mehr der Fall. Premiummarken setzen auf 3D-Druck, realistische Oberflächen und dickere Materialien (2-3mm), die eine überzeugende Illusion echter Fliesen erzeugen. Eine Musterbestellung ist der beste Weg, um sich selbst von der Qualität zu überzeugen.

Kommentar hinterlassen
Diese Website ist durch hCaptcha geschützt und es gelten die allgemeinen Geschäftsbedingungen und Datenschutzbestimmungen von hCaptcha.