


Renter-Friendly RV Makeover: Complete Temporary RV Transformation Guide
Descubre los secretos de la vanlife aesthetic sin arriesgar tu security deposit.
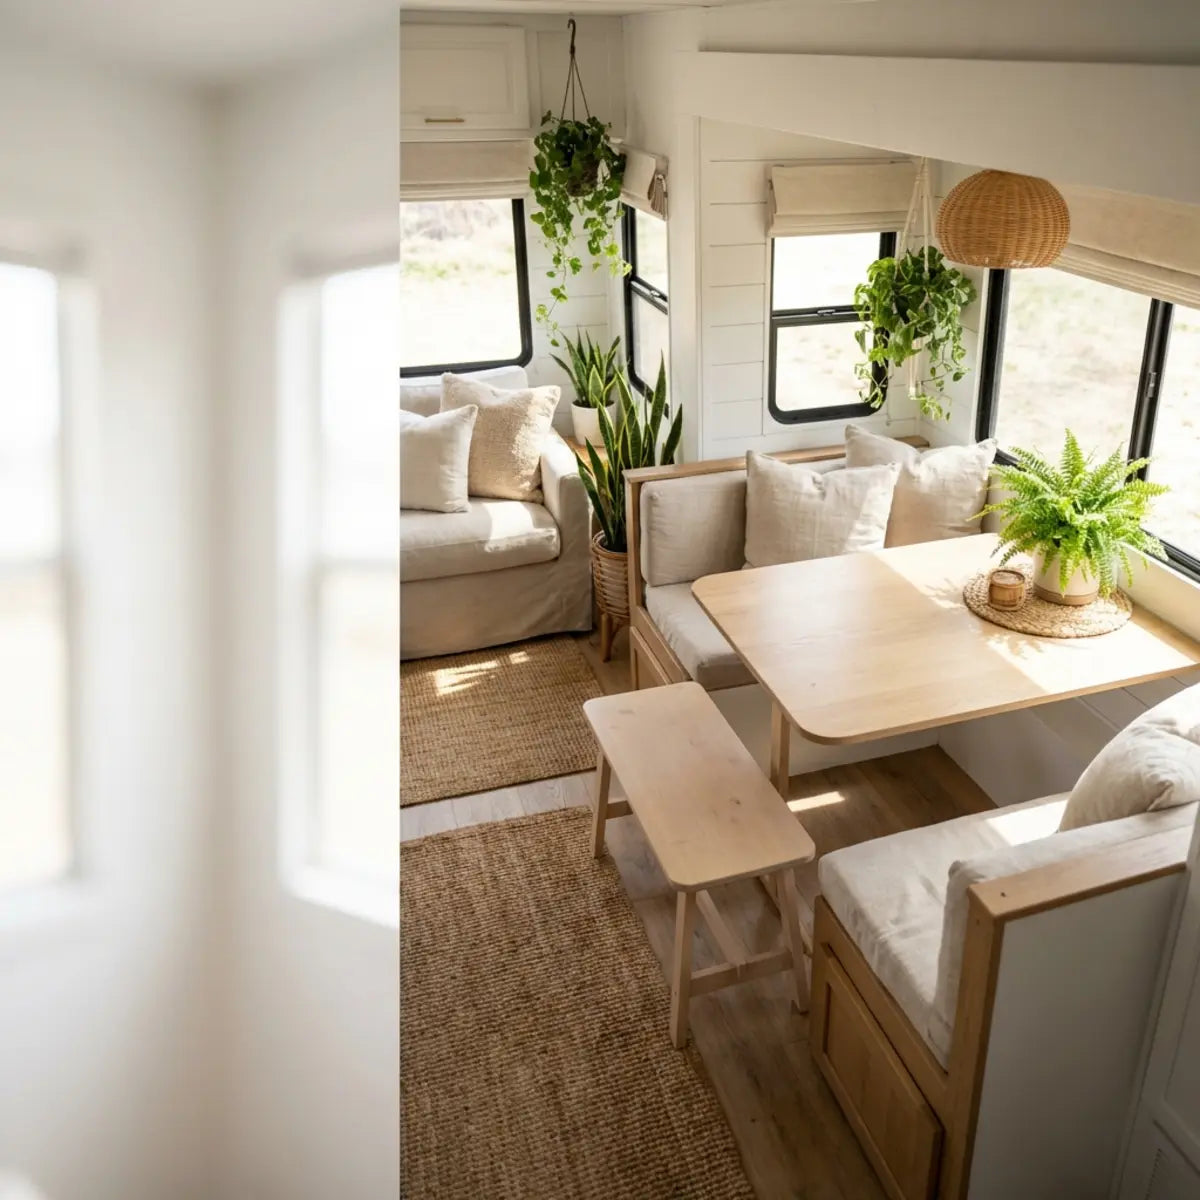
Has reservado el vehículo, trazado la ruta y estás listo para salir a la carretera. Pero entrar en tu RV de alquiler a menudo se siente más como entrar en una clínica beige y estéril que en un hogar acogedor sobre ruedas. Quieres la estética "vanlife" que ves en Instagram, pero te aterra perder tu security deposit.
Un renter-friendly RV makeover significa transformar un RV alquilado con mejoras reversibles y damage-free, como peel-and-stick wallpaper, temporary flooring y removable storage. Estos cambios personalizan el espacio sin invalidar tu rental agreement ni poner en riesgo tu deposit.
En nuestra experiencia trabajando con nomads y renters, sabemos que el equilibrio es delicado. Necesitas comodidad, pero también devolver el vehículo exactamente como lo encontraste. Esta guía se centra en Reversible design principles, Affordable, stylish decor y Deposit-safe transformation strategies.
¿Qué significa un renter-friendly RV makeover?
La pregunta: ¿Sientes que te limita el miedo de que colgar una sola foto pueda costarte cientos en damage fees?
La promesa: Esta sección define exactamente qué es seguro cambiar, dándote la estructura de permiso para hacer tuyo el espacio sin riesgo financiero.
Un renter-friendly RV makeover es la aplicación estratégica de cambios cosméticos que pueden deshacerse por completo en cuestión de horas. Se trata de añadir personalidad sobre la estructura existente en lugar de modificar la estructura en sí.
El principio fundamental aquí es Non-Destructive Modification. Esto significa evitar clavos, tornillos, adhesivos permanentes o pintura. En su lugar, recurrimos a tensión, adhesión estática y adhesivos removibles diseñados específicamente para no dejar residuos. Piensa en ello como aplicar maquillaje en lugar de hacerte un tatuaje. Uno cambia tu apariencia por un día o una semana y se lava; el otro es un compromiso permanente. Tu objetivo es el enfoque "maquillaje" para el interiorismo.

¿Por qué importa la reversibilidad para los renters?
La razón principal de la reversibilidad es obvia: la security deposit. Sin embargo, hay una razón psicológica más profunda. Cuando habitas un espacio que se siente personal, tus niveles de estrés disminuyen. Un estudio publicado en el Journal of Environmental Psychology sugiere que personalizar un espacio de vida contribuye de manera significativa a una sensación de seguridad y bienestar. Para los digital nomads que pasan meses en la carretera, este sentimiento de "hogar" previene el agotamiento de viaje.
Crear un refugio temporal no se trata solo de estética; se trata de salud mental. Cuando tu entorno refleja tu estilo, aunque sea solo mediante recursos temporales como cojines o un backsplash adhesivo, le señalas a tu cerebro que estás "seguro" y "en casa". Esto es crucial cuando la vista fuera de tu ventana cambia cada día.
Ejemplo real: la transformación textil
Veamos a Sarah, una diseñadora gráfica freelance a la que asesoramos el año pasado. Alquiló una autocaravana Clase C para un viaje de tres meses por todo el país. El interior era soso: armarios marrones y tapicería gris.
Sarah no usó ni una sola herramienta. En su lugar, utilizó:
- Magnetic Hooks: Aprovechó los marcos metálicos alrededor de los slide-outs para colgar bolsas de almacenamiento de lona pesadas.
- Slipcovers: Compró tela elástica tipo jersey para cubrir los cojines del comedor.
- Battery-Operated Sconces: Montó las luces con Command strips de alta resistencia.
Cuando devolvió el RV, pasó 45 minutos guardando su "decor kit". El propietario la felicitó por lo limpio que estaba el vehículo, sin saber que apenas unas horas antes parecía un boho studio apartment.
Definición clave: Tensile Strength
En este contexto, tensile strength se refiere a la carga máxima que un material (como un command strip o una tension rod) puede soportar sin fallar. Entender esto garantiza que tu decoración temporal no se caiga cuando el RV reciba un bache.

¿Cómo puedes planificar un temporary RV makeover paso a paso?
La pregunta: ¿La idea de decorar un vehículo en movimiento te resulta abrumadora y caótica?
La promesa: Esta sección ofrece una hoja de ruta lineal y a prueba de fallos para planificar tu mejora, asegurando que no gastes de más ni empaques demasiado.
Planificar un makeover temporal requiere una mentalidad distinta a la de una renovación permanente. Debes dar prioridad a materiales ligeros y a la facilidad de retirada. El primer paso siempre es una evaluación exhaustiva del espacio físico.
Paso 1: La evaluación del layout
Antes de comprar un solo artículo, debes entender la "estructura" del alquiler. Si aún no has recogido la RV, solicita fotos detalladas o un plano al propietario.
- ✓ Identifica las superficies: ¿Las paredes son de fibra de vidrio lisa o de papel tapiz texturizado? Las superficies lisas aceptan productos peel-and-stick; las paredes texturizadas no.
- ✓ Mide el espacio vertical: Mide la distancia entre los gabinetes y las encimeras. Este es tu espacio ideal para salpicaderos.
- ✓ Localiza el metal: Lleva un imán pequeño. Prueba las paredes, los marcos de las ventanas y los frentes de los electrodomésticos. Las superficies metálicas son una mina de oro para almacenamiento magnético sin daños.
Consejo profesional: Las RV vibran intensamente mientras se conduce. Un objeto que se mantiene seguro en una repisa de una casa se convertirá en un proyectil en una RV. Tu evaluación debe considerar la "seguridad en movimiento": cada decoración necesita una forma de asegurarse durante el trayecto.
Paso 2: Establece un presupuesto de diseño seguro para inquilinos
Como no puedes llevarte la RV contigo, quizá dudes en gastar dinero. Sin embargo, si vas a alquilar durante un mes o más, una pequeña inversión rinde frutos en comodidad. Recomendamos una estrategia de "activo portátil": compra cosas que puedas usar en tu próximo alquiler o en tu hogar permanente.
Si te preocupa la complejidad del bricolaje con un presupuesto ajustado, podrías pensar que necesitas habilidades de contratista. No es así. Hemos reunido un desglose completo sobre Cómo instalar baldosas adhesivas sin esfuerzo que simplifica el proceso en 5 pasos fáciles, ayudándote a entender los pros y los contras antes de gastar un centavo.
| Categoría del artículo | Costo estimado | Reutilización | Nivel de riesgo para inquilinos |
|---|---|---|---|
| Azulejos autoadhesivos | $40 - $80 | Bajo (uso único) | Bajo (si se retira correctamente) |
| Textiles (alfombras/cojines) | $50 - $100 | Alto (Conservar para siempre) | Cero |
| Iluminación (luces tipo puck) | $20 - $40 | Alto | Cero |
| Ganchos/tiras adhesivas | $15 - $25 | Bajo (consumible) | Bajo |
| Costo total estimado | $125 - $245 | Mixto | Muy bajo |
Para quienes buscan mantener los costos estrictamente bajo control mientras maximizan el impacto, recomendamos encarecidamente leer nuestra guía sobre Cómo renovar la cocina con un presupuesto en 2025. Este recurso describe estrategias específicas para usar baldosas peel-and-stick y lograr un aspecto de alta gama por menos de $100, perfecto para una instalación temporal en alquiler.

Mini caso de estudio: la renovación económica de la "familia Miller"
La familia Miller (dos adultos, un niño pequeño) alquiló una caravana de viaje para un recorrido de seis semanas por los parques nacionales. Tenían un presupuesto estricto de $200 para mejoras.
- Ignoraron el dormitorio y se centraron por completo en la zona principal de estar.
- Compraron una alfombra grande lavable para exteriores para cubrir el linóleo gastado ($60).
- Usaron baldosas removibles peel and stick para crear un salpicadero brillante detrás del fregadero de la cocina ($50).
- Gastaron el resto en cestas y barras de tensión para organizar los juguetes del niño pequeño ($90).
El resultado: La alfombra ocultó el feo suelo y aportó calidez. El salpicadero hizo que la cocina se sintiera hecha a medida. Se mantuvieron por debajo del presupuesto y retiraron todo en 30 minutos al final del viaje.
¿Cuáles son las mejores ideas reversibles de decoración y almacenamiento para inquilinos de RV?
La pregunta: ¿Te cansas de mirar paneles marrones y encimeras abarrotadas en tu pequeña cocina?
La promesa: Aquí revelamos los productos y técnicas específicos que usan los expertos para maximizar el estilo y el almacenamiento sin dejar rastro.
Las mejores ideas para RV renters combinan funcionalidad con estética. En un espacio pequeño, un objeto decorativo suele tener que cumplir una doble función. Nos centramos en decoración de pared sin clavos, temporary flooring y almacenamiento vertical.
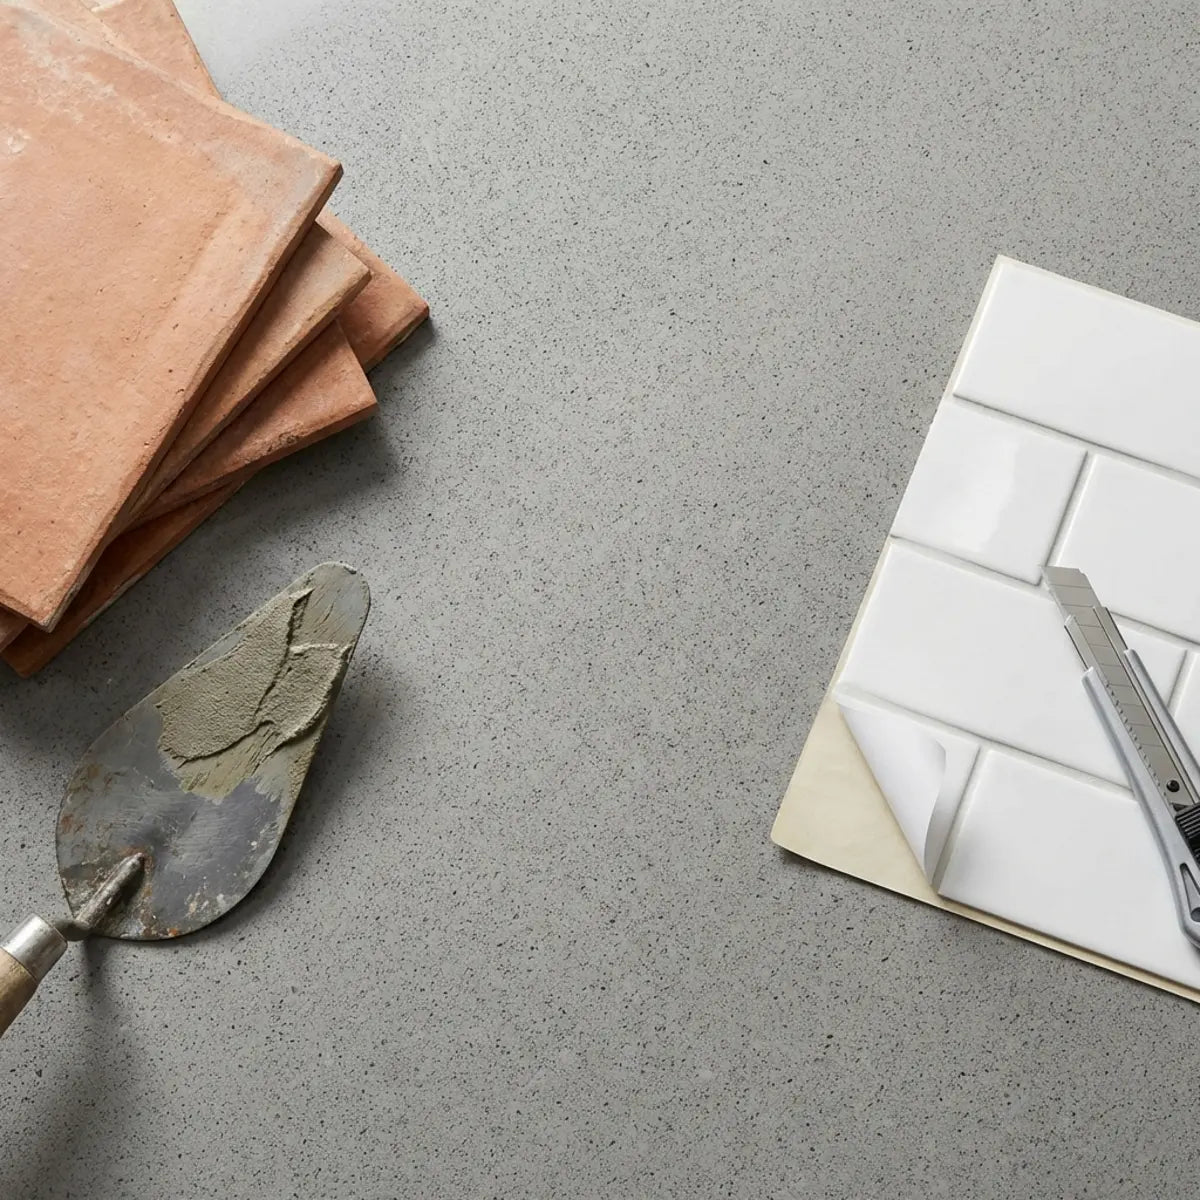
La magia de los backsplashes peel and stick
El cambio más impactante que puedes hacer en un RV es renovar el backsplash. Las cocinas estándar de RV suelen tener wallboard sencillo detrás de la estufa, que es difícil de limpiar y visualmente aburrido.
Por qué esto funciona para renters:
La tecnología moderna peel-and-stick utiliza un adhesivo a base de gel. Se adhiere con la suficiente fuerza para soportar la humedad, pero sigue siendo lo bastante flexible como para despegarse con calor (de un secador de pelo) sin romper el papel del wallboard.
Pasos para una aplicación segura para renters:
- Limpia la superficie: Usa alcohol isopropílico para eliminar la grasa. Los adhesivos fallan en paredes grasosas.
- Planifica la distribución: Presenta las baldosas en seco antes de despegar el respaldo.
- Aplica y presiona: Una presión firme activa la adherencia.
Si te preocupa el proceso de retirada, es fundamental conocer la técnica antes de empezar. Te recomendamos revisar Transforma y retira con seguridad las baldosas peel and stick para renters. Esta guía ofrece tranquilidad al mostrar exactamente cómo quitar las baldosas cuando termina tu viaje.
Además, la precisión es clave para lograr un acabado pulido. Si te encanta la estética urbana clásica, echa un vistazo a nuestra Guía fácil: instala baldosas subway peel & stick. Ofrece una guía de instalación muy visual con consejos para resolver problemas, especialmente útiles para quienes hacen su primer proyecto DIY.
Opción recomendada:
Para un look fresco, inspirado en la naturaleza y que disimula bien las salpicaduras, considera Ideas de backsplash verde peel & stick aptas para renters. Los tonos verdes conectan el interior de tu RV con el exterior, haciendo que el espacio se sienta más grande.
Decoración de pared para RV sin clavos
No puedes usar clavos en un RV. Las paredes son delgadas, a menudo compuestas por contrachapado luan o material compuesto con aislamiento de Styrofoam detrás. Un clavo no se sostendrá y deja un agujero permanente.
La solución: tensión mecánica y adhesión
- • Command Strips: Usa las tiras estilo "Velcro" para marcos de fotos. Absorben mejor la vibración que las tiras con gancho.
- • Museum Putty: Esta sustancia reutilizable, similar a una arcilla, es increíble para fijar objetos pequeños (como un florero o un reloj) sobre una encimera para que no se deslicen mientras conduces.
- • Barras de tensión: Usa barras de tensión pequeñas dentro de los armarios para evitar que los objetos se caigan, o en vertical entre estantes para crear separadores.

Soluciones de temporary flooring
Los suelos de los RV sufren mucho desgaste. A menudo están cubiertos de vinilo genérico y resbaladizo.
Baldosas de espuma entrelazadas: Son fantásticas para familias. Aíslan (manteniendo el suelo cálido) y son suaves al pisar. Puedes cortarlas para que se adapten exactamente a la forma del plano del RV con un cúter. Cuando te vayas, solo tendrás que levantarlas.
Alfombras de pasillo con agarre: Usa alfombras largas de pasillo para cubrir las zonas de mayor tránsito. Asegúrate de que tengan un reverso de goma antideslizante. Si no lo tienen, debes añadir una base para alfombra, o se deslizarán peligrosamente cuando el RV frene.
Ideas de almacenamiento para RV para renters
El almacenamiento es el mayor dolor de cabeza en los RV. Los renters a menudo viven con maletas porque el almacenamiento integrado es incómodo.
Visualizar el espacio: la regla del "centímetro vertical"
En un RV, cada centímetro vertical cuenta. Si un estante de armario mide 12 inches, pero tus platos solo miden 2 inches, estás desperdiciando 10 inches de almacenamiento.
La solución:
- Elevadores para armarios: Rejillas de alambre que duplican el espacio de tus estantes.
- Organizadores colgantes para puertas: Usa organizadores de zapatos para artículos de higiene, snacks o cables de carga.
- Cestas con ventosas: En el baño, usa cestas con ventosa de alta calidad fijadas al espejo o a la puerta de la ducha de vidrio para guardar cepillos de dientes y jabón.
Para cocinas pequeñas específicamente, la distribución lo es todo. Para ver trucos detallados sobre cómo maximizar estos espacios culinarios tan ajustados, consulta Cómo los trucos de decoración para cocinas pequeñas transforman el espacio. Ofrece ejemplos visuales brillantes de cómo organizar el espacio vertical puede hacer que una kitchenette se sienta como la galera de un chef.
Interactivo: ¿Es segura esta mejora?
¿No estás seguro de si tu idea hará que pierdas el depósito? Selecciona una opción abajo para poner a prueba tus conocimientos sobre seguridad en RV.
Truco avanzado para inquilinos: la transformación del baño
El baño de la RV suele ser la estancia más deprimente de la casa rodante alquilada: plástico amarillento y almacenamiento insuficiente.
La estrategia de mejora “spa”:
- Organización de la ducha: Usa una barra de tensión en la esquina de la ducha para colgar cestas para el champú.
- Mejora visual: Aplica una pequeña tira de azulejo adhesivo impermeable encima del lavabo.
- Retirada: Al retirar los azulejos de un baño, usa un secador de pelo para ablandar el adhesivo. Así evitarás dañar el revestimiento de plástico.
Para una guía completa de esta zona concreta, la guía de producto Mejoras de baño renter-friendly con azulejos adhesivos es el estándar del sector para una aplicación y retirada seguras en entornos húmedos.
Además, si el compartimento de la ducha tiene muy mal aspecto, puede que te tiente ocultarlo. Aunque no puedes sustituir el compartimento, sí puedes mejorar la zona que lo rodea. Echa un vistazo a la Guía de renovación de ducha con azulejo tipo metro para inspirarte sobre cómo usar adhesivos resistentes al agua de forma segura en zonas de mucha humedad.
Preguntas frecuentes
¿El papel pintado adhesivo daña las paredes de la RV?
Por lo general, no, siempre que elijas papel pintado específico “retirable” o “renter-friendly”. Las paredes de las RV suelen estar cubiertas de fábrica con un “papel pintado” de vinilo. Si aplicas un adhesivo muy agresivo sobre esto, podría formar burbujas o despegar la capa de fábrica al retirarlo. Haz siempre primero una prueba en una zona pequeña y poco visible, y usa calor (secador de pelo) al retirarlo.
¿Puedo pintar las paredes de mi RV de alquiler?
Absolutamente no. Pintar se considera una modificación permanente. Aunque la pintes de blanco, habrás alterado su estado de fábrica. Esta es la forma más rápida de perder todo tu depósito de seguridad. Limítate a cubrir las superficies con materiales retirables en lugar de alterar la propia superficie.
¿Cuánto cuesta una renovación temporal de RV?
Puedes lograr un cambio visual importante por entre 100 y 300 $. Este presupuesto cubre un salpicadero, una alfombra, cojines decorativos y organizadores adhesivos. Como puedes llevarte 80% de estos artículos a tu próximo alquiler, el coste a largo plazo es aún menor.
¿Cómo evito que la decoración se caiga mientras conduzco?
El efecto “terremoto” de conducir es real. Usa cinta de montaje para exteriores de alta resistencia para los elementos que deban permanecer fijos (asegúrate de que sea removible) o masilla Museum Putty para los objetos de las estanterías. Para colgantes más pesados, el Velcro industrial (gancho y bucle) es mejor que los ganchos estándar porque evita que el objeto se balancee y golpee contra la pared.
Reflexiones finales
Renovar una RV de alquiler no va de reformar; va de adaptación. Se trata de tomar un vehículo genérico y producido en masa e infundirle suficiente alma para que se sienta como un hogar, aunque solo sea durante una semana.
Recuerda: el objetivo es crear un espacio que te recargue después de un largo día de senderismo o de conducir. Al centrarte en mejoras reversibles como azulejos adhesivos, textiles inteligentes y almacenamiento no destructivo, proteges tu tranquilidad y tu depósito de seguridad.
¿Lista para empezar tu transformación?
No dejes que el miedo a las normas te impida vivir con estilo. Empieza con algo pequeño, como un salpicadero o una alfombra, y observa cómo cambia el espacio. ¿Has probado alguna vez una mejora temporal en un alquiler? ¿Cuál fue tu mayor reto?
Explora colecciones renter-friendly

Deja un comentario
Este sitio está protegido por hCaptcha y se aplican la Política de privacidad de hCaptcha y los Términos del servicio.