


The Deposit Defense: Safe Stickwoll Removal Guide
There is a specific kind of anxiety that hits every renter about a month before their lease ends. It’s that moment you look at the beautiful, customized walls you created and think, "How am I going to get this down without the landlord keeping my money?" We have all been there. You want a personalized home, but you also need your security deposit back to fund your next move.
The Core Strategy
To remove Stickwoll without wall damage, gently heat the adhesive with a hairdryer set to low heat, peel the tile slowly at a 45-degree angle, and clean any remaining residue with a citrus-based eco-safe remover. This method maintains the integrity of the drywall paper, prevents paint peeling, and ensures you meet the standard for a full rental deposit return.
In our experience working with thousands of renters, the difference between a full refund and a deduction for "wall repairs" usually comes down to technique, not luck. This guide is your insurance policy. We will walk you through the science of adhesives, the preparation required, and the exact physical motions needed to leave your walls looking exactly as they did on move-in day.
Thinking About Your Next Project?
Are you a renter looking to jazz up your living space without annoying your landlord? Removable peel and stick tiles are your new best friend! In fact, nearly 65% of renters have successfully transformed their homes with these stylish, temporary tiles. But before you dive in, let's explore everything from installation magic to safe removal. Whether you want a splash of color or a sleek, modern feel, these tiles offer flexibility and flair. So, let's delve deeper into the renter's dream world of peel and stick tiles, all without leaving a trace when it's time to move out.
Explore Renter-Friendly Tiles →What makes Stickwoll products renter-friendly yet tricky to remove?
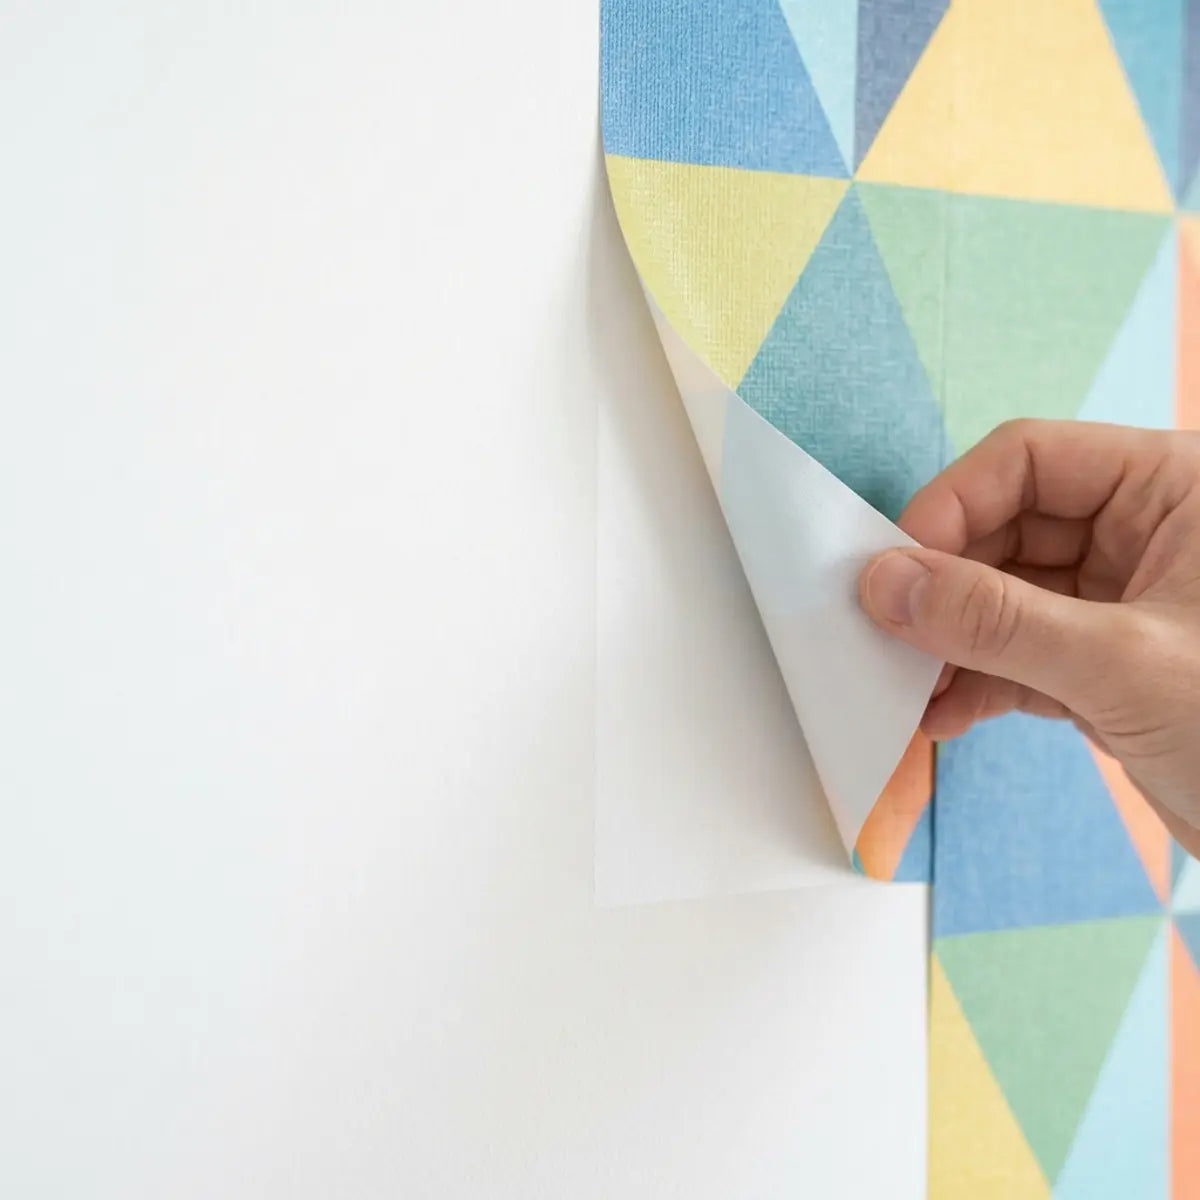
The secret to Stickwoll’s durability—and the challenge during removal—lies in the technology of **Pressure-Sensitive Adhesives (PSA).**
A type of non-reactive adhesive which forms a bond when pressure is applied to marry the adhesive with the adherend (the wall). No solvent, water, or heat is needed to activate the adhesive.
Unlike traditional wallpaper paste that soaks into the drywall, PSAs rely on physical interactions known as Van der Waals forces. These are weak electric forces that attract neutral molecules to one another. When you press a Stickwoll tile onto the wall, the adhesive flows into the microscopic peaks and valleys of your paint texture. Over time, this bond "wets out," meaning it settles deeper into those texture gaps, increasing the grip strength.
🛡️ Deposit Risk Assessment
Before you peel, assess your wall's risk level.
1. How long have the tiles been installed?
The "Snap-Back" Effect
A common misconception is that pulling harder removes the tile faster. In reality, PSAs are viscoelastic—they exhibit properties of both liquids and solids. If you pull quickly (high velocity), the adhesive acts like a solid and resists, often ripping the paint or drywall paper with it. If you pull slowly, it behaves like a liquid, stretching and releasing its grip without damage.
Analogy: The Honey Trap
Think of the adhesive like cold honey. If you try to scoop cold honey quickly, it’s hard and stubborn. If you warm it up and move the spoon slowly, it flows. Your goal is to turn the adhesive back into a fluid state before lifting it.

Adhesive Strength Variations
Not all stick tiles are created equal. In our analysis of the market, detailed in our comprehensive comparison, we found that cheaper brands often use aggressive, solvent-based acrylics that harden over time (oxidize). Stickwoll uses a balanced, water-based formulation designed to remain stable. However, even the best adhesive requires respect during removal.
📊 Industry Analysis: Looking to revamp your home without the mess? Peel and stick tiles might be your secret weapon! With a simple application process that even DIY amateurs can handle, these tiles are taking the world by storm. But which brand should you trust? Whether it's Stickwoll leading the pack or a newcomer that's stealing the show, our guide will walk you through the best options available in 2025. Transform your space effortlessly and stylishly! Read the 2025 Brand Comparison Report »
Real-World Scenario: The "Friday Night" Mistake
I recently consulted with a tenant, "Mark," who tried to remove his kitchen backsplash at 11:00 PM the night before moving. Rushing, he ripped the tiles at a 90-degree angle (straight out from the wall). The result? Patches of drywall paper tore off, requiring spackling, sanding, and repainting. He lost $250 of his deposit. Contrast this with "Sarah," who used the heat-and-peel method we describe below, spending 30 minutes longer but securing her full check.
How can you prepare your walls for safe Stickwoll removal?
Proper preparation is the single biggest predictor of success. You cannot simply start peeling a corner and hope for the best. You need to control the environment.
The Essential Removal Toolkit
Before you touch a single tile, assemble this kit. We recommend using eco-friendly options where possible to maintain indoor air quality.

🔥 Heat Source
Hairdryer (with concentrator nozzle). Reactivates the adhesive to a fluid state. Heat guns are generally too hot and risk scorching paint.
🛠️ Mechanical Aid
Plastic Putty Knife or Credit Card. Lifts the initial corner without gouging the drywall.
💧 Solvent
Citrus-based adhesive remover (e.g., Goo Gone). Breaks down residue bonds safely. Avoid acetone on painted walls.
🛡️ Protection
Drop cloth or old towels. Catches falling debris and prevents sticky residue from hitting the carpet.
✨ Cleanup
Microfiber cloths + Dish Soap. Removes the oily residue from the solvent for a matte finish.
Assessing Wall Condition
Before applying heat, inspect the perimeter of your installation. If you notice any areas where the paint was already chipping before you installed the tiles, handle these zones with extreme care.
⚠️ Critical Paint Check: Thinking about revamping your space with peel and stick tiles but unsure about installation on painted walls? Fear not! Whether you're a DIY enthusiast or a first-timer, this guide will walk you through the process, ensuring a flawless finish. Did you know that improperly installing tiles can lead to a costly redo? Here, we’ll break down the steps and highlight common pitfalls to keep you on track for success!
Master the Art of Painted Walls →
Pro-Tip: The "Tap Test"
Lightly tap the wall areas surrounding the tiles. If it sounds hollow or papery compared to other parts of the wall, the paint adhesion underneath might be poor (common in older apartments with many layers of paint). In these cases, you must proceed even slower with higher heat.
The "24-Hour" Strategy
Do not leave removal for the final hour of your lease. The ideal time to remove Stickwoll is 24 to 48 hours before your final inspection.
- 1. Clear the Room: Move furniture away from the wall to give yourself a 4-foot working radius.
- 2. Temperature Control: Ensure the room is at least 65°F (18°C). Cold walls make adhesives brittle and harder to remove.
- 3. Floor Protection: Adhesives can be incredibly stubborn if they fall on carpet. Lay down your drop cloth.
💡 Easy Installation Hack: Are you ready to revamp your space with a new look? The stick and tile method is your go-to solution for a quick yet stylish upgrade! But wait, before you start sticking those tiles, there are common mistakes you need to avoid and essential prep tips to ensure perfect adhesion. With a bit of preparation, you can transform any room effortlessly. Whether you're a DIY novice or a seasoned decorator, our guide will help you achieve professional-looking results. Let's dive into this simple stick and tile method, your space deserves it! Read the Simple Stick & Tile Method.
What are the step-by-step methods to remove Stickwoll without wall damage?
This is the core execution phase. We are looking for a slow, deliberate release of the bond.
Phase 1: The Thermal Release
Heat is your best friend. It lowers the viscosity of the adhesive, making it pliable.
- 1 Set Up the Hairdryer: Set your hairdryer to the "High" or "Warm" setting.
- 2 Target the Corner: Focus the air stream on the top-right or top-left corner of the first tile. Hold the dryer about 3–4 inches away from the surface.
- 3 The 20-Second Rule: Apply heat for roughly 20 seconds. You should feel the tile become warm to the touch, but not too hot to handle.
Phase 2: The Surgical Lift
Once the corner is warm, do not use your fingernails, which can bend back and cause injury, or dig into the paint.
- Use the Tool: Slide the edge of your plastic putty knife under the heated corner.
- Wiggle, Don't Jab: Gently wiggle the tool to create a small flap of loose tile.
Phase 3: The 45-Degree Peel (Critical Step)
This is where most renters fail. The angle at which you pull determines the stress on the wall.

- The Wrong Way: Pulling the tile straight out (90 degrees) or back onto itself (180 degrees) puts maximum tension on the drywall paper. This is what causes tearing.
- The Right Way: Pull the tile slowly down and away at a 45-degree angle. Imagine you are trying to stretch the tile gently rather than rip it off.
- Chase with Heat: As you peel, keep the hairdryer moving just ahead of the peel line. One hand pulls, the other heats. The adhesive should release silently. If you hear a ripping sound (like Velcro), STOP. Apply more heat.
📽️ Visual Learning Center
For a comprehensive visual breakdown of this specific motion, we strongly recommend reviewing our primary resource: How to Install and Remove Stickwoll Tiles Without Damaging Walls. Learn how to install and remove Stickwoll tiles safely with our renter-friendly guide. Protect your walls, avoid residue, and upgrade your space hassle-free. It offers the most detailed visual examples of the 45-degree technique in action.
Watch the Removal Tutorial →Phase 4: Managing Stubborn Spots
Occasionally, you may hit a spot where the adhesive is thicker.
- Do not force it.
- Direct the heat specifically at that spot for an extra 10 seconds.
- Use your plastic tool to gently sever the adhesive strands behind the tile as you pull.
Need to install Subway Tiles next? Provides a foolproof, visual-rich installation guide with troubleshooting tips tailored for people with no prior tiling experience. Beginner’s Guide to Painting Kitchen Cabinets, Affordable Renter-Friendly Home Upgrades. See the Subway Tile Guide Here.
Handling Residue Safely
Once the tiles are down, you might see small patches of sticky residue.
- Apply Eco-Solvent: Put a small amount of citrus-based remover on a microfiber cloth (never directly on the wall).
- Blot, Don't Scrub: Blot the residue to saturate it. Let it sit for 2 minutes.
- Wipe Clean: Gently wipe away the residue.
- Final Wash: Wash the area with warm water and a drop of dish soap to remove the oily solvent. This leaves the wall matte and ready for inspection.
Want to Avoid Damage from Day One?
Learn how to install peel and stick wall tiles, renter-friendly hacks, and removal tips for stylish, damage-free wall upgrades in apartments. Goes beyond standard installation tutorials by showing exact removal techniques, renter hacks, and pro tips for waterproofing or handling tricky surfaces.
Get the Damage-Free Install GuideHow to assess and repair minor wall imperfections?
Even with the best technique, older paint might flake. The difference between a "damage deduction" and "normal wear and tear" is often how you handle these small imperfections.
The "Invisible" Repair Method
If a small chip of paint comes off (less than the size of a dime):
-
➜
Smoothing: Take a fine-grit sanding sponge and very gently smooth the edges of the chip so it is not jagged.
-
➜
Spackling: Use a small dab of lightweight spackle. Press it in with your finger and wipe away the excess immediately.
-
➜
Paint Touch-Up: If you have the original paint code (ask your landlord!), dab a tiny amount on. If not, the spackle is usually white enough to pass as a minor scuff.
For those who used our products in high-traffic areas, check out our insights on maintenance. Peel and stick tiles have revolutionized home decor, offering a simple and stylish solution for transforming spaces. But just how do you keep them looking their best? It's no secret that maintenance can be the deciding factor between a dull tile and one that shines bright for years. Did you know that improper cleaning can reduce the lifespan of your tiles significantly? In this guide, I'll walk you through the secrets of keeping your peel and stick tiles lustrous and intact. Read the 2025 Maintenance Guide »
Final Inspection Checklist
Before you hand over the keys, do a final sweep:
📋 Interactive Move-Out Checklist

Frequently Asked Questions
How long does it typically take to remove Stickwoll tiles?
In our experience, you should budget approximately 20–30 minutes per 10 square feet of coverage. Rushing is the primary cause of damage. A standard kitchen backsplash (approx. 30 sq ft) usually takes about an hour to remove safely, including cleanup time.
Can I reuse the tiles after removing them?
Generally, no. The removal process involves stretching the material (viscoelastic deformation), which distorts the shape of the tile. Furthermore, the adhesive collects dust and loses its tackiness once removed. While some high-end products claim reusability, for the sake of a clean removal, we prioritize the wall's safety over saving the tile.
What if I don't have a hairdryer?
While a hairdryer is the safest tool, you can use a steamer in a pinch, but be very careful. Steam introduces moisture to the drywall, which can soften the paper facing. If you use a steamer, keep it moving constantly and keep a towel handy to wipe away condensation immediately. We always recommend borrowing a hairdryer if you don't own one.
Is Goo Gone safe for painted walls?
Standard Goo Gone is effective, but you must use it sparingly. It is oil-based, and if left on matte paint for too long, it can leave a grease stain (which looks like a dark spot). Always apply it to the cloth, not the wall, and wash the wall with dish soap and water immediately after the adhesive is gone to remove the oils.
Final Thoughts
The fear of losing a security deposit shouldn't stop you from creating a home you love. The "Deposit Defense" isn't just about being careful—it's about understanding the mechanics of the materials you are using. By applying heat, using the correct 45-degree angle, and cleaning up with patience, you reverse the installation process without trauma to the wall.
Remember, the goal is to leave the apartment in a condition where the next tenant—or your landlord—can't tell you ever had anything on the walls.
🗳️ Reader Poll
What is your biggest pain point when moving out?
Ready to move out with confidence?
Don't rely on guesswork. Get the right tools and checklists now.


Leave a comment
This site is protected by hCaptcha and the hCaptcha Privacy Policy and Terms of Service apply.