





















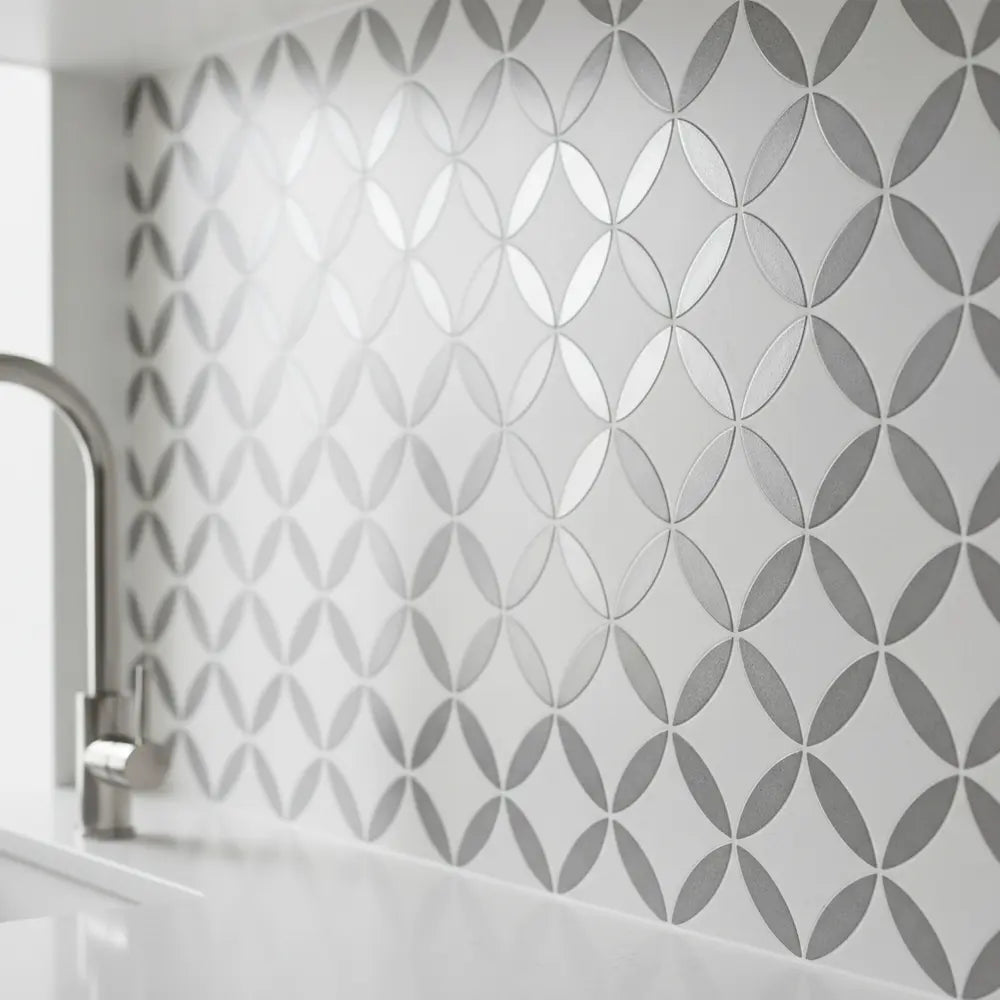
25 Modern Vinyl Backsplash Ideas for Stylish Homes
Explore this guide
Think vinyl looks cheap? Think again. The story of vinyl in 2024 is no longer about old-school peel-and-stick squares from the discount aisle—it’s about innovation, aesthetics, and the growing demand for home upgrades that are both stylish and practical...
Find Your Perfect Backsplash Style
Not sure which vinyl backsplash direction to choose? Take this quick quiz to discover your ideal match.
Why Vinyl Backsplash Ideas Appeal to DIY Projects
Vinyl is experiencing a renaissance... The transformation power per dollar is unmatched.
Kitchen Vinyl Backsplash Ideas: 10 Chic Designs
The kitchen is the heart of the home and the natural stage for bold backsplash choices...
If you're especially interested in fresh kitchen revamp solutions, consider reading our detailed guide "Peel Stick Backsplash Kitchen Ideas 2025" for further inspiration.
DIY lovers who want a step-by-step walkthrough of both installing and styling can check "How to Install Peel and Stick Tiles & Best Designs 2025", which complements the ideas in this article.
Bathroom Vinyl Backsplash Ideas: 8 Stylish Examples
Bathrooms invite creativity, but water-resistance and easy cleaning are critical. Vinyl excels here with designs that balance durability and spa-like appeal...
Want to explore trending design options at the intersection of style and practicality? Our article "Top Peel & Stick Tile Patterns for 2025" provides stunning alternatives you can incorporate in bathrooms as well.
Laundry Room Vinyl Backsplash Ideas: 7 Creative Options
Laundry rooms are often neglected design zones...
To understand how tiles, accents, and vinyl can work together across different rooms, read "What Kitchen Backsplash Tile Guide", which provides comparative insights on materials and suitability.
How to Choose the Right Vinyl Backsplash for Your Style
Choosing a vinyl backsplash isn’t one-size-fits-all...
If you love the subway tile aesthetic in particular, explore "Modern Peel and Stick Subway Tiles: A Chic Kitchen Upgrade"—a perfect resource for timeless kitchen elegance with vinyl ease.
And if you're hunting for clever wall treatments beyond just the backsplash, we recommend "Stylish Kitchen Wall Accents: Peel and Stick Tiles", offering creative ideas to accentuate your kitchen.
Conclusion
Vinyl has evolved far beyond its outdated reputation...
If you'd like to shop and experience this for yourself, try the Verdant Dawn peel-and-stick tiles, a beautiful budget-friendly option great for kitchen or bath.
You can also learn more about selecting and sourcing directly with our guide "Best Peel & Stick Vinyl Backsplash 2024: Where to Buy", which will help you choose the best retailer and style.
Q&A
Start with the room exposure before the vinyl look
A kitchen prep wall, bathroom vanity side wall and laundry room accent wall do not have the same heat, splash or cleaning conditions. Choose the room zone first, then compare vinyl products documented for that use.
A decorative vinyl face can be wipeable without making seams, edges and substrate waterproof.
Identify film, embossed sheet or thicker panel construction
Vinyl backsplash is a broad label. Record thickness, face coating, backing, adhesive, sheet size, intended substrate and room restrictions.
A thin flexible film may follow wall texture differently from a thicker embossed or composite-backed product.
Use full-size samples for stone and tile prints
Faux marble, terrazzo and subway designs often repeat. Place several pieces together to see whether the repeat looks convincing at wall scale.
Check print direction, joint appearance and edge thickness from the room entrance.
Test color under task lighting
Glossy vinyl can reflect under-cabinet light while matte finishes may show texture and color differently. Compare samples in the actual room at night.
A screen image cannot reproduce exact sheen or relief.
Keep cooking zones product-specific
Do not extend decorative vinyl behind a range or countertop appliance based on a generic heat-resistant claim. Use appliance and exact product requirements.
Where documentation is unclear, stop the vinyl before the heat zone.
Treat sink and laundry splash separately
Repeated splash can reach seams and lower edges. Fix leaks and failed caulk before installation and keep the wall substrate appropriate for the exposure.
Do not use the decorative finish to hide moisture damage.
Dry-layout seams before peeling liners
Preview vertical and horizontal joints around cabinets, mirrors, windows and appliances. Shift the start point if a visible seam can be moved to a calmer location.
Directional prints should be marked before cutting.
Plan exposed ends and corners
Vinyl backing or thickness may be visible at cabinet ends. Use the documented edge method and avoid adding permanent trim solely to hide a poor layout.
A clean stop can be more flexible for future removal.
Keep service points accessible
Outlet covers, shutoffs and appliance access should remain removable.
Decorative vinyl is not a structural layer for shelves, rails or grab bars.
Match cleaning to the face coating
Check whether the surface permits degreasers, disinfectants, abrasives or only mild cleaners.
Choose the material with the household routine in mind rather than assuming every vinyl face cleans the same way.
Keep repair stock flat and labeled
Store full pieces as the manufacturer recommends, with product identity and pattern direction.
Local repairs are easier when the material has not curled, faded or become unidentified.
Plan removal where future change matters
Photograph the wall and preserve the product instructions. Work gradually during removal and stop when the original coating begins to release.
A removable label does not assure unchanged paint or drywall.
Use a final vinyl decision sheet
Record room, wall condition, product, heat and splash zones, layout, cleaner and removal plan.
Proceed only when the actual product and actual wall fit the project.
Use one wall as the prototype
If several rooms may receive vinyl, start with one representative wall and live with the finish through ordinary cleaning before expanding the project.
A successful kitchen sample does not automatically prove bathroom or laundry suitability, but it can reveal how the visual scale and care routine fit the household.
Compare printed grout with true seams
Some vinyl sheets print grout lines, some emboss them and others create visible joints between pieces. Inspect several pieces together and decide whether the seam system works with the pattern.
A printed line is decorative; it should not be assumed to perform like a designed grout joint or waterproof seam.
Plan kitchen terminations at cabinet ends
Mark where the vinyl field stops at open cabinet sides, doors and appliance gaps. Use a full-size mockup to compare a clean vertical stop with wrapping around a return.
A simple termination is often easier to clean, repair and remove later.
Treat bathroom vanity walls as splash zones
A wall beside a sink can receive repeated droplets even when it is outside a shower. Observe actual use and verify the product for that exposure.
Keep plumbing leaks and failed caulk visible and repaired before applying a decorative covering.
Keep direct-wet shower use out of generic vinyl advice
A product suitable for a vanity or dry bathroom wall is not automatically part of a shower waterproofing system. For broader planning, see our bathroom wall guide.
Use a complete documented wet-area assembly for direct spray and saturation.
Plan laundry walls around appliances and hoses
Laundry rooms combine vibration, supply hoses, drain connections, heat and possible humidity. Keep shutoffs and service points accessible and do not cover evidence of leakage.
A decorative vinyl accent can work on an appropriate dry wall without becoming part of the appliance installation.
Use pattern direction to reduce visible waste
Stone veining, brick layouts and geometric motifs can make offcuts difficult to reuse when reversed. Mark orientation before cutting and plan the first row around the most visible edge.
This can reduce waste more effectively than adding a generic extra percentage.
Inspect corners for buildup
Old caulk, paint ridges and uneven drywall at corners can prevent full contact. Repair only with methods compatible with the existing finish and the selected product.
Do not use extra glue to force vinyl over an unstable edge.
Keep sunlight and fading in the room test
A bright window wall can expose decorative prints to stronger light than an interior backsplash. Check product documentation for the intended environment and compare samples in the actual location.
A short sample cannot predict years of color change, so keep long-term claims modest.
Use lower-contrast seams where practical
A highly contrasting pattern can make every cut and joint more visible. If seam appearance is a concern, compare a quieter print or larger format before buying.
Design can reduce the need to hide inevitable construction details.
Keep a cleaning test piece
Save one scrap for trying the permitted cleaner before using a new product across the installed wall.
This is especially useful when household cleaners change over time.
Record transitions between different materials
If vinyl meets tile, painted drywall, metal or another backsplash, photograph and document the transition.
A later repair should preserve service access and avoid trapping moisture at the boundary.
Plan future repainting
A removable backsplash may still influence how the wall is prepared and painted later. Keep the original wall and removal record until any restoration is complete.
Do not assume the next coating can be applied directly over residue without appropriate surface preparation.
Use one final room-specific checklist
For each kitchen, bathroom or laundry wall, record product, substrate, moisture, heat, layout, cleaner and removal plan separately.
This prevents one broad vinyl article from turning into the same prescription for every room.
Compare kitchen prep and dining walls separately
A dry dining wall can support more decorative experimentation than a wall exposed to cooking grease or sink splash. Use the same color story in different technical materials when needed.
This expands the design options without pretending one vinyl product fits every part of the kitchen.
Use backsplash height as a design variable
A short counter backsplash, full cabinet-to-counter field and taller feature section produce different pattern scale and seam counts. Tape the intended height before ordering.
More coverage is not automatically better when the higher area is visually quiet or technically unnecessary.
Plan around open shelving
Shelves interrupt the field and create shadow lines. Mock up the vinyl with shelf positions marked and keep structural attachments independent from the decorative layer.
A strong repeat may need more negative space around displayed objects.
Treat appliance alcoves carefully
Refrigerator and laundry-machine recesses can trap heat, moisture or dust and may have service clearances. Do not extend decorative vinyl into inaccessible areas simply for continuity.
Keep service and ventilation needs primary.
Use a product sample for edge curling observation
A small sample can reveal whether the material wants to curl tightly at the edge during handling and cutting.
That observation can inform trim and corner planning without becoming a longevity claim.
Keep cut edges away from repeated wiping when possible
High-contact edges beside a sink or counter end may experience more abrasion. Place terminations in calmer locations when the room layout allows it.
A better boundary can reduce maintenance without changing the main pattern.
Plan mirrored or symmetrical layouts carefully
Stone-look or geometric vinyl may tempt a centered symmetrical arrangement. Confirm whether the print actually repeats in a way that supports mirroring before cutting.
Forced symmetry can expose repeated graphics and create more waste.
Use one material board per room
A bathroom green cabinet, kitchen wood cabinet and laundry white appliance each change the same vinyl sample differently. Build separate room boards rather than assuming one successful palette transfers.
Room-specific boards also keep the exposure notes tied to the correct location.
Keep a wall-restoration note with removable projects
Record paint brand or color when known, previous repairs and the condition before installation.
Future touch-up is easier when the wall history was preserved instead of hidden by the decorative layer.
Use a seasonal inspection for edges and seams
Check high-use vinyl walls when heating or air-conditioning seasons change. Look for local lifting, condensation or cleaning residue.
Document changes before pressing or patching them so the cause can be investigated.
Compare replacement availability before committing to a large field
Some fashion-driven vinyl prints change quickly. If future matching matters, check whether the product is a stable collection and retain enough repair stock.
A broad wall can be harder to repair invisibly when no matching material remains.
Keep the final room choice simple
After the shortlist, choose the product that fits wall, exposure, cleaning and layout with the fewest unresolved exceptions.
A more dramatic pattern is not a better choice when it requires ignoring several technical limitations.
Use cabinet toe-kicks and low walls cautiously
Low wall areas can receive shoe, vacuum and cart contact that a decorative vinyl face was not selected to handle.
Keep the product in zones that match its intended use and expected contact.
Plan around door casings and window trim
Vinyl that meets painted trim needs a clean termination. Dry-fit the edge and decide whether the material stops short, meets trim or uses a documented finishing detail.
Do not overlap serviceable trim simply to avoid a cut.
Keep seams out of the strongest light when possible
A seam directly under a strong grazing light can become more visible. Preview the wall with normal lamps on and place unavoidable joints thoughtfully.
Lighting-aware layout can improve appearance without altering the product.
Use a simple pattern on complicated walls
Walls with many outlets, windows and corners can turn a complex print into fragmented pieces. A quieter pattern may produce cleaner visual continuity.
Let wall geometry influence the design shortlist.
Check how vinyl meets caulk and sealant
Existing caulk can be flexible, dirty or loosely bonded and may not be a suitable adhesive substrate. Keep the product boundary tied to its installation instructions.
Repair failed joints for their intended purpose before decorating nearby.
Keep the face out of high-abrasion work areas when undocumented
A wall beside a utility sink, tool bench or laundry cart may receive repeated contact. Verify the product finish or place it in a lower-contact zone.
A decorative face should not be treated as an impact-protection panel without evidence.
Use a sample to check print depth and realism
Stone and tile graphics can look flatter or more convincing depending on relief and light angle. View the sample from normal distance rather than only close up.
This is an appearance test, not proof of material performance.
Plan one easy-access edge for removal
Where the design permits, keep a termination that remains accessible instead of burying all edges behind permanent trim.
Future removal is easier to begin when the system has a clear boundary.
Store installation photos before objects return
Photograph the finished field, seams and edges before counters, appliances or shelves hide them.
These images give future repairs a clear baseline.
Recheck the wall after the first month
Inspect local lifting, cleaner residue, seam visibility and moisture signs after ordinary use.
A local condition found early can be investigated before it becomes a larger issue.
Keep vinyl out of unknown-fire or heat applications
A decorative vinyl product should not be assumed suitable near fireplaces, heaters or cooking equipment without specific documentation.
Move the design to a verified zone when those conditions cannot be established.
Use one final cross-room rule
The same visual vinyl can be used in more than one room only when each wall independently passes substrate, exposure and care checks.
Shared style does not eliminate room-specific technical limits.
Use color temperature as a first filter
Warm whites, creams and beige stone prints can connect with wood cabinets, while cool whites and blue-grays may reinforce stainless or painted cabinetry.
Compare actual samples because screen white balance can hide undertone differences.
Use a calmer print behind busy countertops
A heavily veined counter plus a heavily veined vinyl wall can create competing movement. Test a quieter alternative on the material board.
The backsplash does not need to repeat every pattern already in the room.
Use stronger prints on simpler walls
A dry side wall with few interruptions can carry a bolder geometric or mural-like vinyl better than a backsplash broken by outlets and appliances.
Place visual complexity where the wall geometry supports it.
Keep bathroom mirrors in the layout mockup
A vanity backsplash may be mostly hidden by a mirror or medicine cabinet. Mark those edges before selecting pattern scale and coverage.
This prevents paying for a dramatic repeat that is cut into small fragments around fixtures.
Use laundry shelving as part of the pattern test
Detergent bottles, baskets and shelves create visual clutter in a laundry room. A quieter vinyl background may make the space feel more organized.
Mock up the installed wall with the real storage plan, not an empty staged wall.
Keep utility-wall cleaning practical
Laundry walls can collect lint, detergent splashes and dust. Choose a vinyl finish whose documented care fits those conditions.
Do not choose deep texture solely for appearance if routine cleaning becomes difficult.
Check whether the product can be cut cleanly at thin strips
Narrow areas beside cabinets or trim can require small pieces. Practice the cut and decide whether a trim or different termination would be more stable.
A layout that avoids very thin vinyl strips is usually easier to install and maintain.
Keep future room changes in mind
If a bathroom vanity, laundry machine or kitchen counter may be replaced soon, avoid extending a strong print into areas likely to be reconfigured.
Put more permanent-looking pattern where the wall geometry is stable.
Use a dry-wall feature as the safest place for dramatic prints
When a bold vinyl pattern is not documented for sink, shower or heat exposure, place it on an eligible dry wall instead of abandoning the design entirely.
This separates the visual idea from the technical zone.
Keep room humidity in the maintenance record
Bathrooms and laundry rooms can change seasonally with ventilation and weather. Note recurring condensation instead of treating edge lift as an isolated adhesive problem.
Moisture source and room conditions deserve investigation before repair.
Check seam direction against cleaning strokes
A seam orientation that catches cloth edges during frequent wiping may be less convenient than another documented layout.
Consider ordinary maintenance when choosing how sheets overlap or align.
Use a neutral backup finish for discontinued prints
If a highly specific pattern cannot be matched later, identify a coordinating neutral that could replace one small zone or transition if necessary.
Repair planning is easier when the room does not depend on one irreplaceable print.
Keep the final installation note with the room
Record date, wall, product, cleaner and spare-material location.
That short handover makes future care and removal much more predictable.
Use a neutral vinyl as a bridge between rooms
A simple stone, warm white or quiet geometric can connect kitchen, laundry and bathroom palettes without forcing the same exact print everywhere.
Use separate products when technical conditions differ, but let color or scale provide visual continuity.
Keep bathroom vanity edges easy to dry
Avoid complicated narrow strips where water repeatedly collects beside a sink. A clean edge and accessible caulk joint are easier to inspect and maintain.
The decorative field should not make ordinary moisture management harder.
Plan laundry splash around utility sinks
Utility sinks can throw more water and cleaning chemicals onto nearby walls than a standard vanity. Verify the exact vinyl and wall condition for that zone.
Use a more suitable finish when the documented care does not match the household routine.
Keep labels off serviceable wall areas
Utility labels, shutoff markings and access panels should remain visible.
A decorative pattern should not make emergency or maintenance information harder to find.
Keep the final room record complete
Store the exact product, wall location, exposure notes, cleaner, spare pieces and removal guidance together.
That one record makes future care, repair and change easier than relying on a generic vinyl category.
Keep one final principle
Use vinyl for the wall and room conditions the exact product actually supports, and move the design idea to another surface when those conditions are not met.
The visual concept can survive even when the material choice changes.
Final vinyl note
Keep the exact product, room and care instructions attached to the project record so future household members do not have to infer material limits from appearance alone.
Project record
Keep one final photo of every installed vinyl wall, including seams and exposed ends, before furniture and appliances hide them.
Final note
Keep the product instructions with the room for future care and removal.
Sources and scope
- US DOE: Color and Spectrum — Lighting and color-rendering context; not a material rating.
- 3M: Applying VHB Pressure-Sensitive Tape — General adhesive surface-preparation principles; not Stickwoll specifications.
- US EPA: Mold, Moisture and Your Home — Moisture-control guidance; not approval of a wall covering.


Leave a comment
This site is protected by hCaptcha and the hCaptcha Privacy Policy and Terms of Service apply.